
Attention
This is a security device.To ensure the security of your Scout Travel, a specific pairing and unpairing sequence is required. Do not attempt to pair your Scout Travel via the iOS Bluetooth settings.
For a successful Bluetooth connection, you must pair your Scout Travel using the Knog app and Apple Find My app.
Please carefully follow the instructions to successfully pair your Scout Travel with an iPhone. Failure to pair or unpair your Scout Travel as instructed may result in connection issues or an inoperable device.
Downloadable Guides
English Guide: Download here OR view instructions below.
Japanese Guide: Scout Travel クイックスタートガイド日本語版
German Guide: Schnellstartanleitung
French Guide: Télécharger ici
Dutch Guide: Snelstartgids
Spanish Guide: Guía de inicio rápido
Polish Guide: Pobierz tutaj
Korean Guide: 여기에서 다운로드하세요
How To Set Up Your Scout Travel Guide
Follow these step-by-step instructions to set up, pair and arm your Scout Travel.
Step 1: Enable Pairing
Only pair your Scout Travel using the Knog app and Apple Find My app.
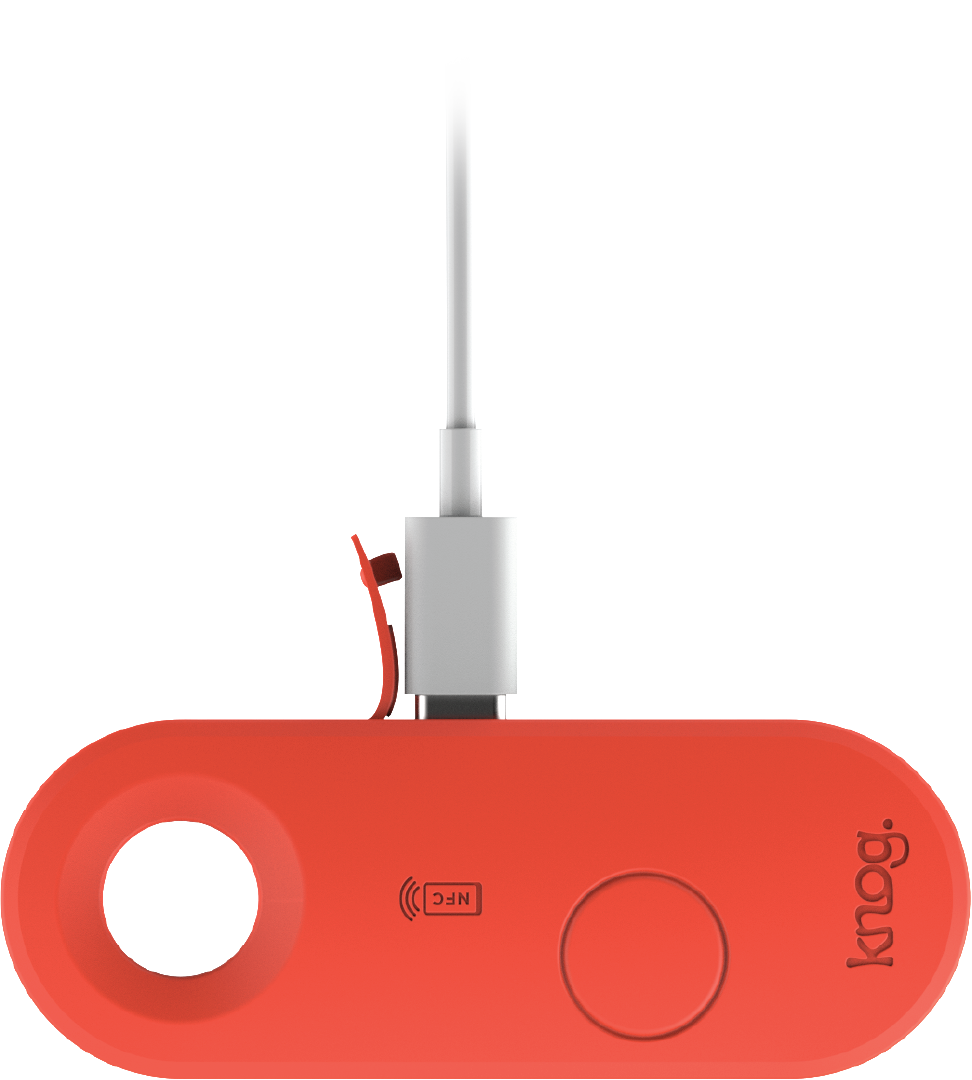
Before you pair your Scout Travel to your iPhone, connect the device to a USB charger via a standard USB-C
cable. When the charging cable is inserted you will hear a 3-tone beep.


*If the Scout Travel was previously linked to another Knog mobile account or Apple ID, make sure that it has been removed from accounts via the Knog Mobile and Find My apps, then perform a factory reset of the Scout Travel as described further below
Step 2: Set Up Knog App
1. Find and install the Knog app from the app store.
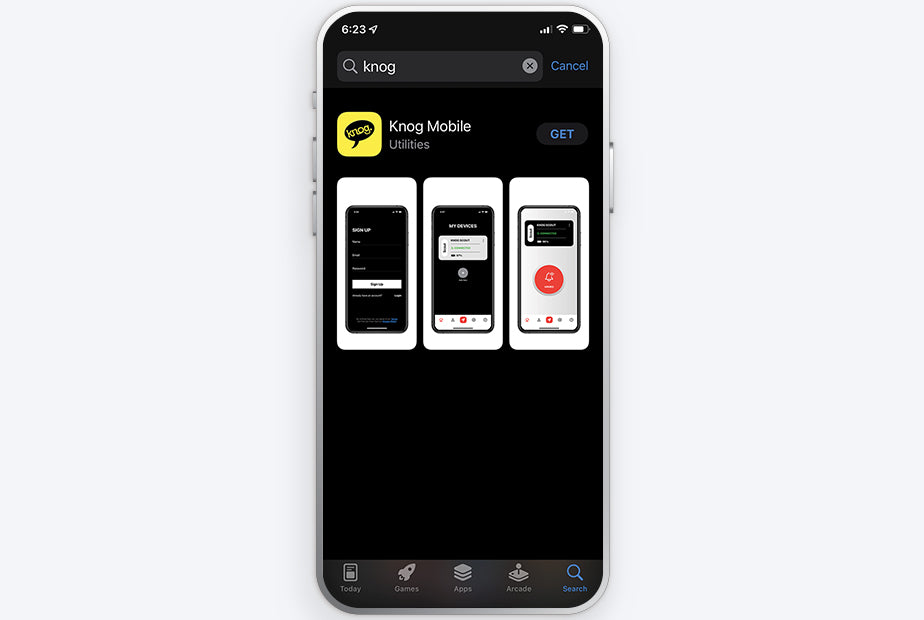
2. Enter your information and click 'Create Account' to create your profile.

Step 3: Connect & Register Device
1. Make sure your Scout Travel is charged and in close range. Click on the + button to search for the Scout.
The Scout Travel will remain in pairing mode for 10 minutes once the charger in plugged in. If the Scout Travel fails to appear under 'My Devices', re-connect the charger.
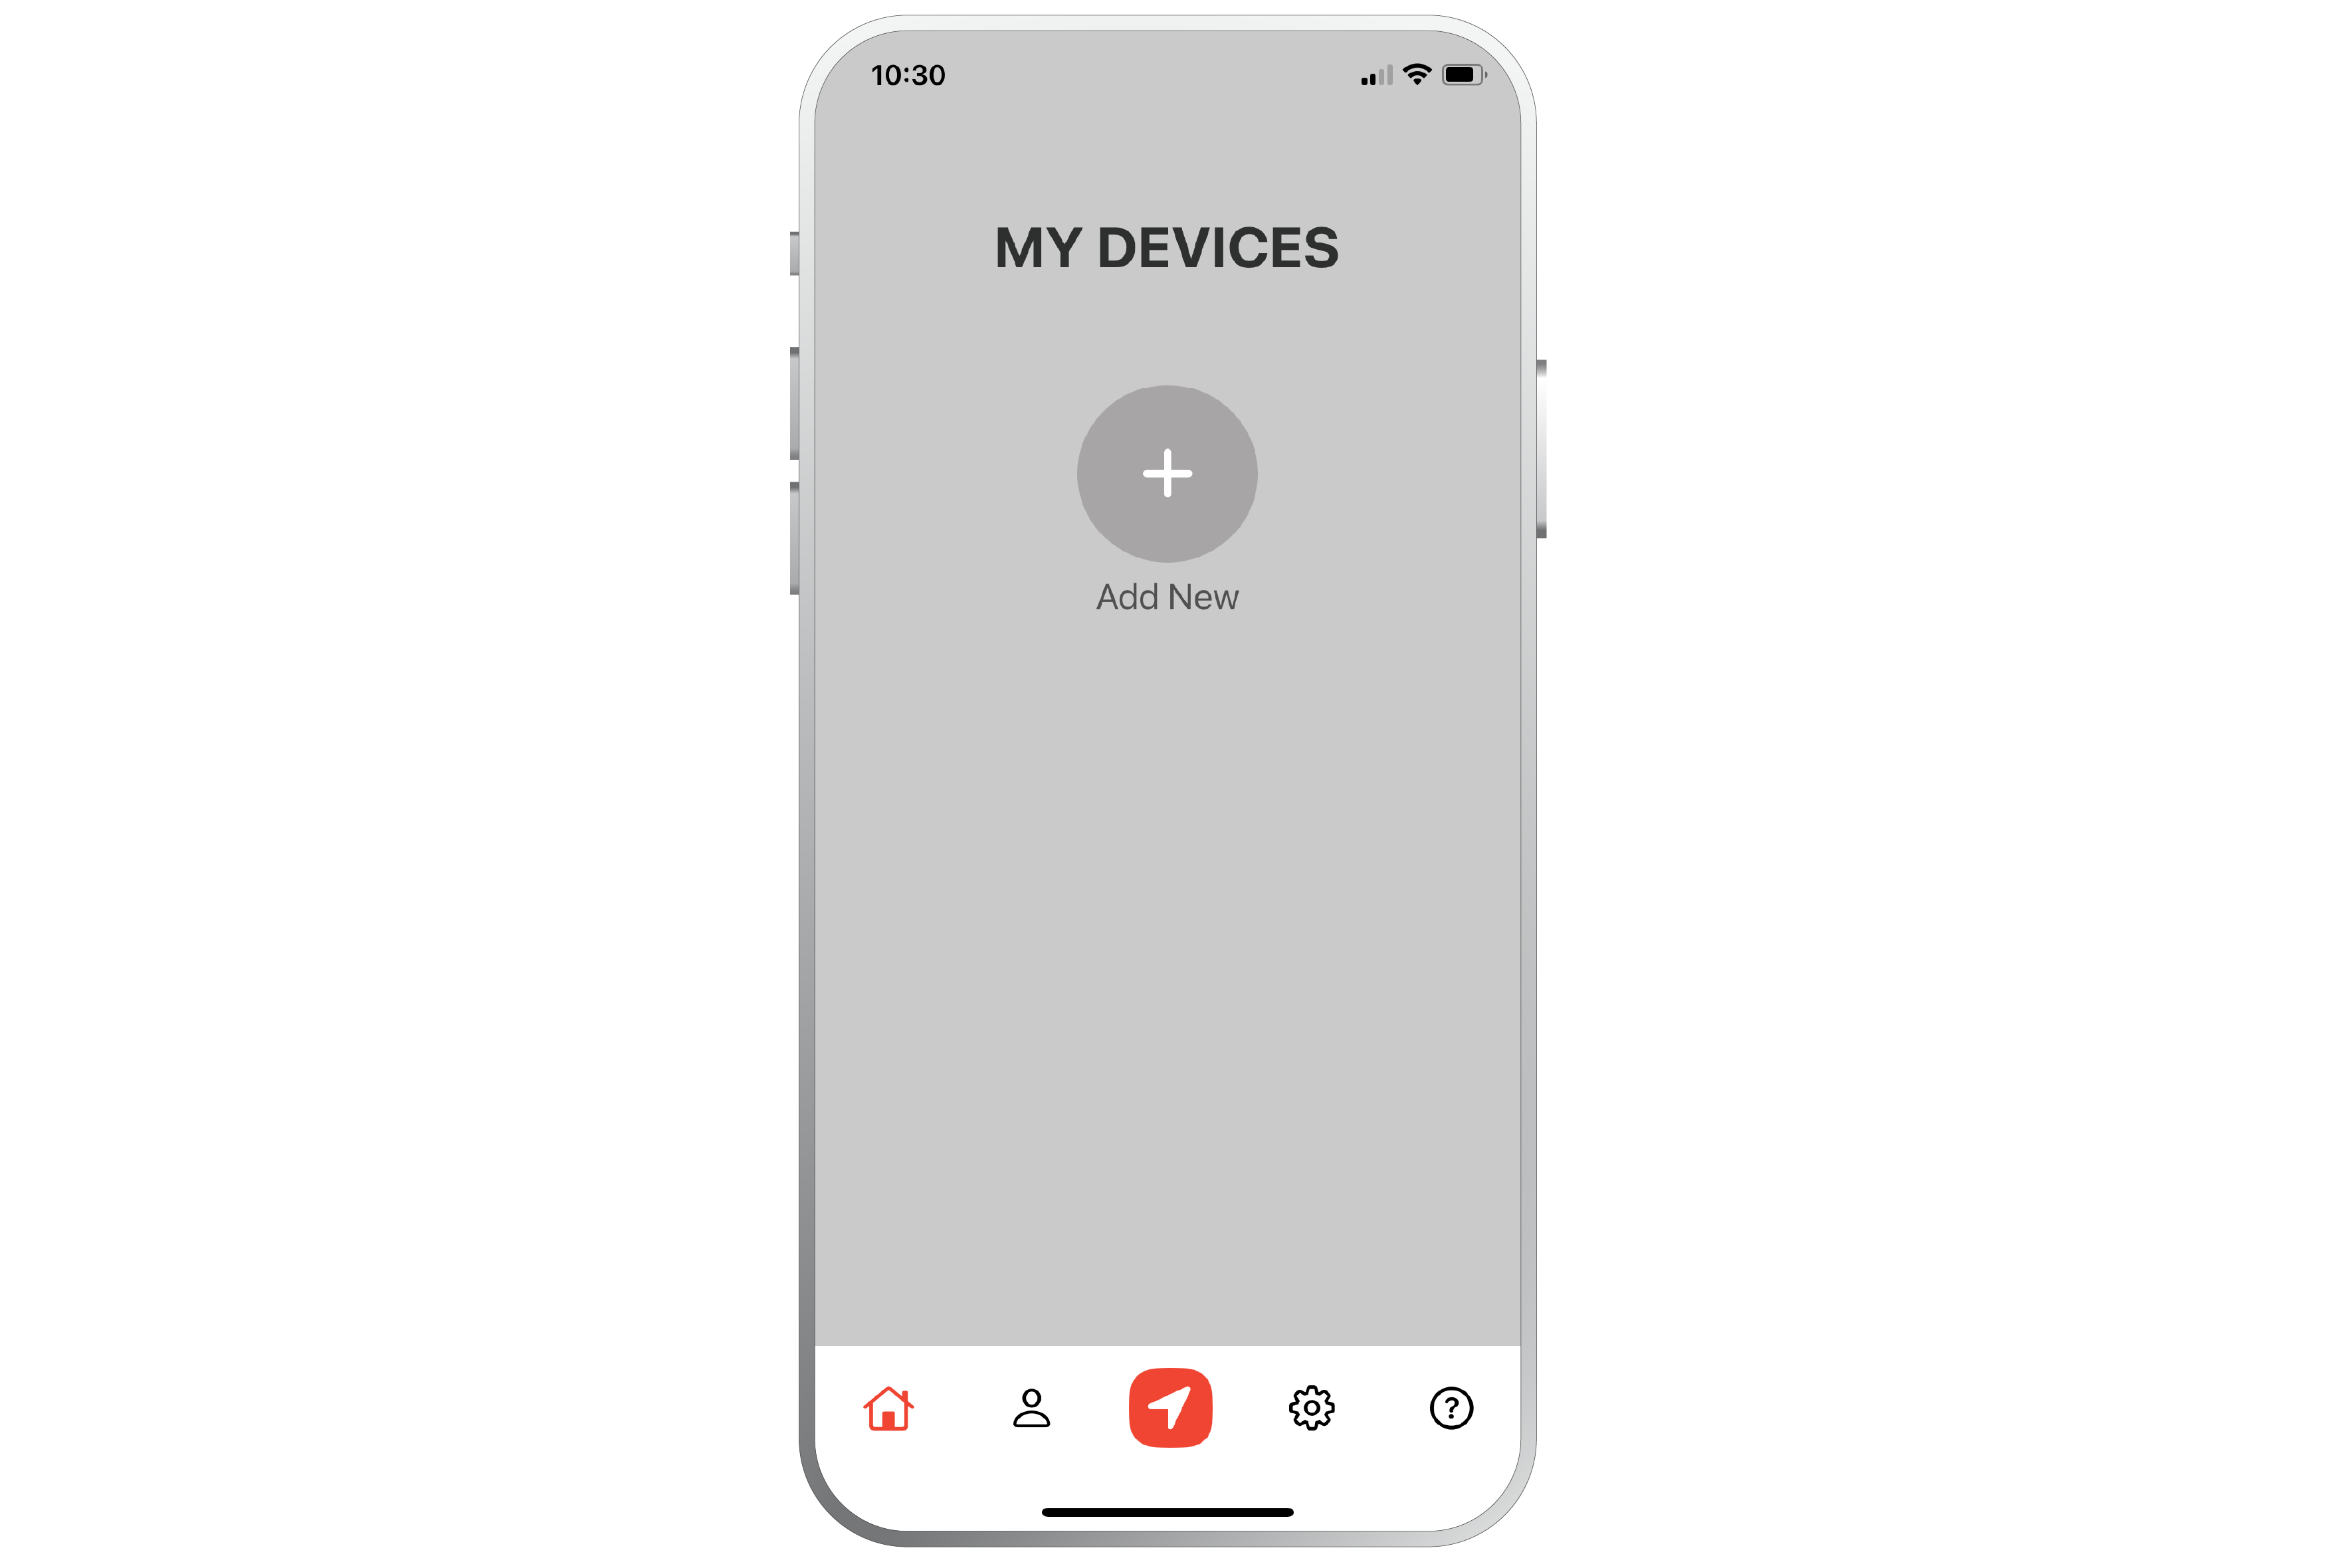
2. Select device to add “Scout Travel”.
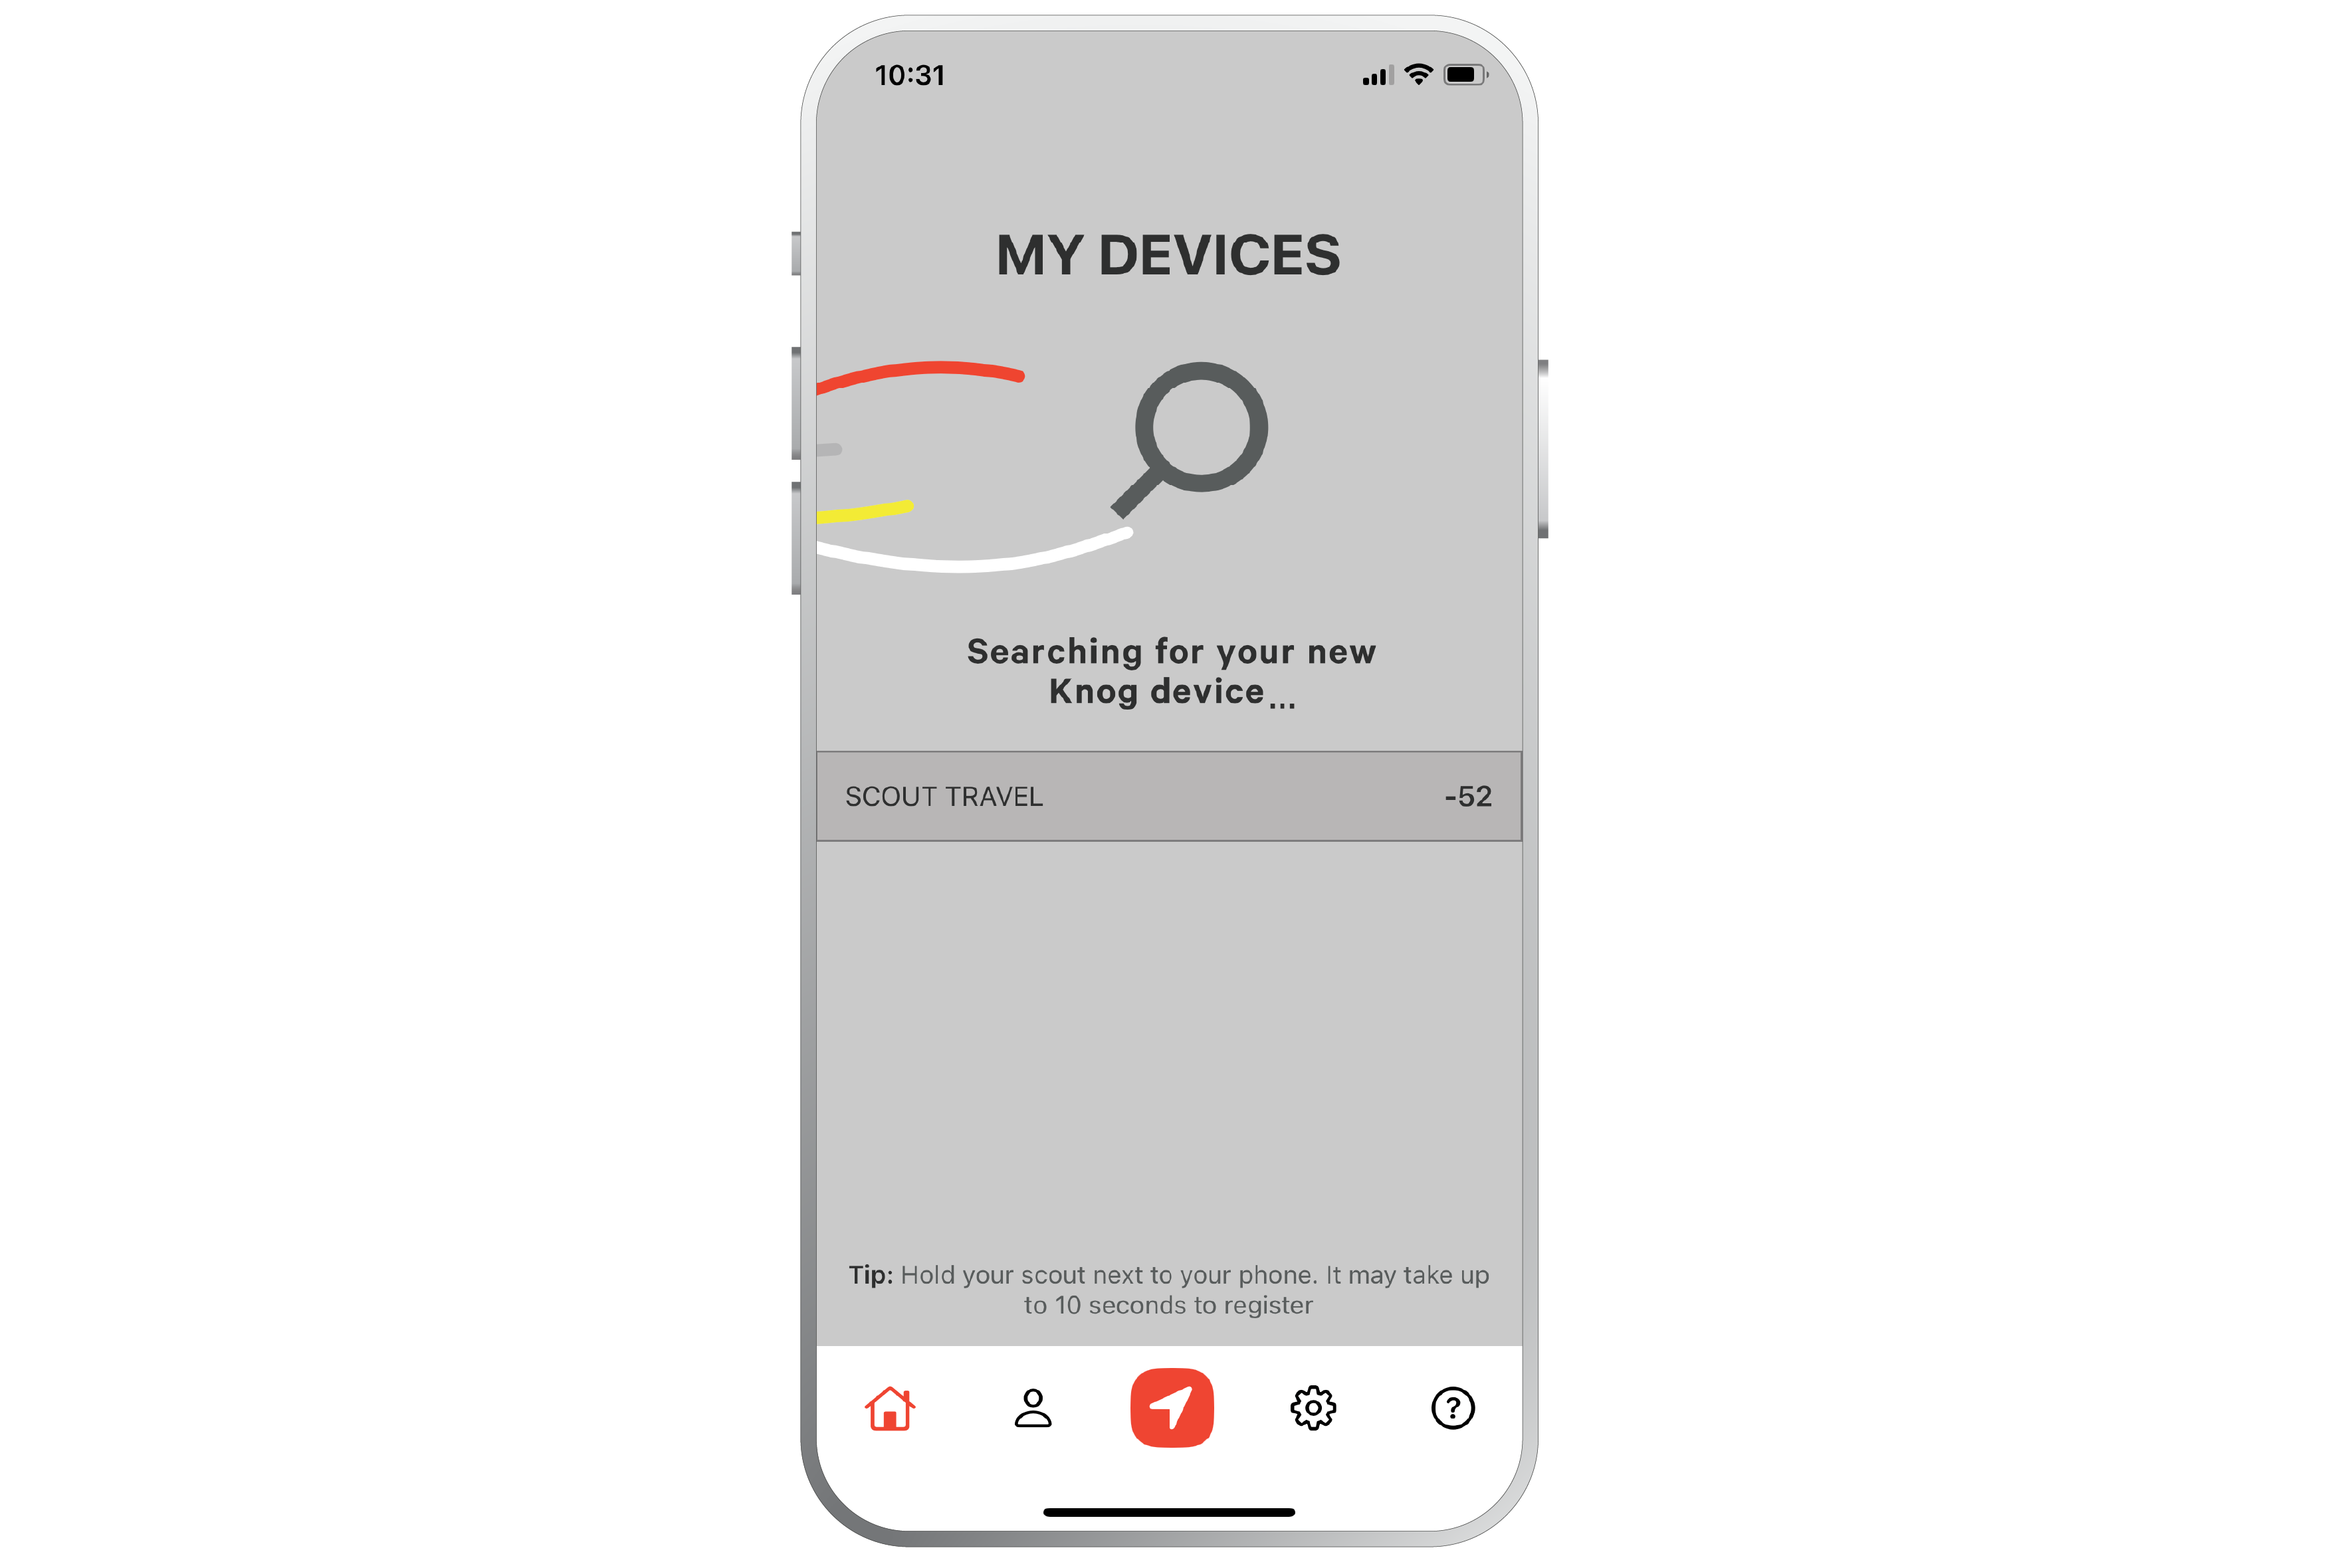
3. Choose a name for your Scout Travel.

4. Complete the connection by accepting the Bluetooth pairing request.
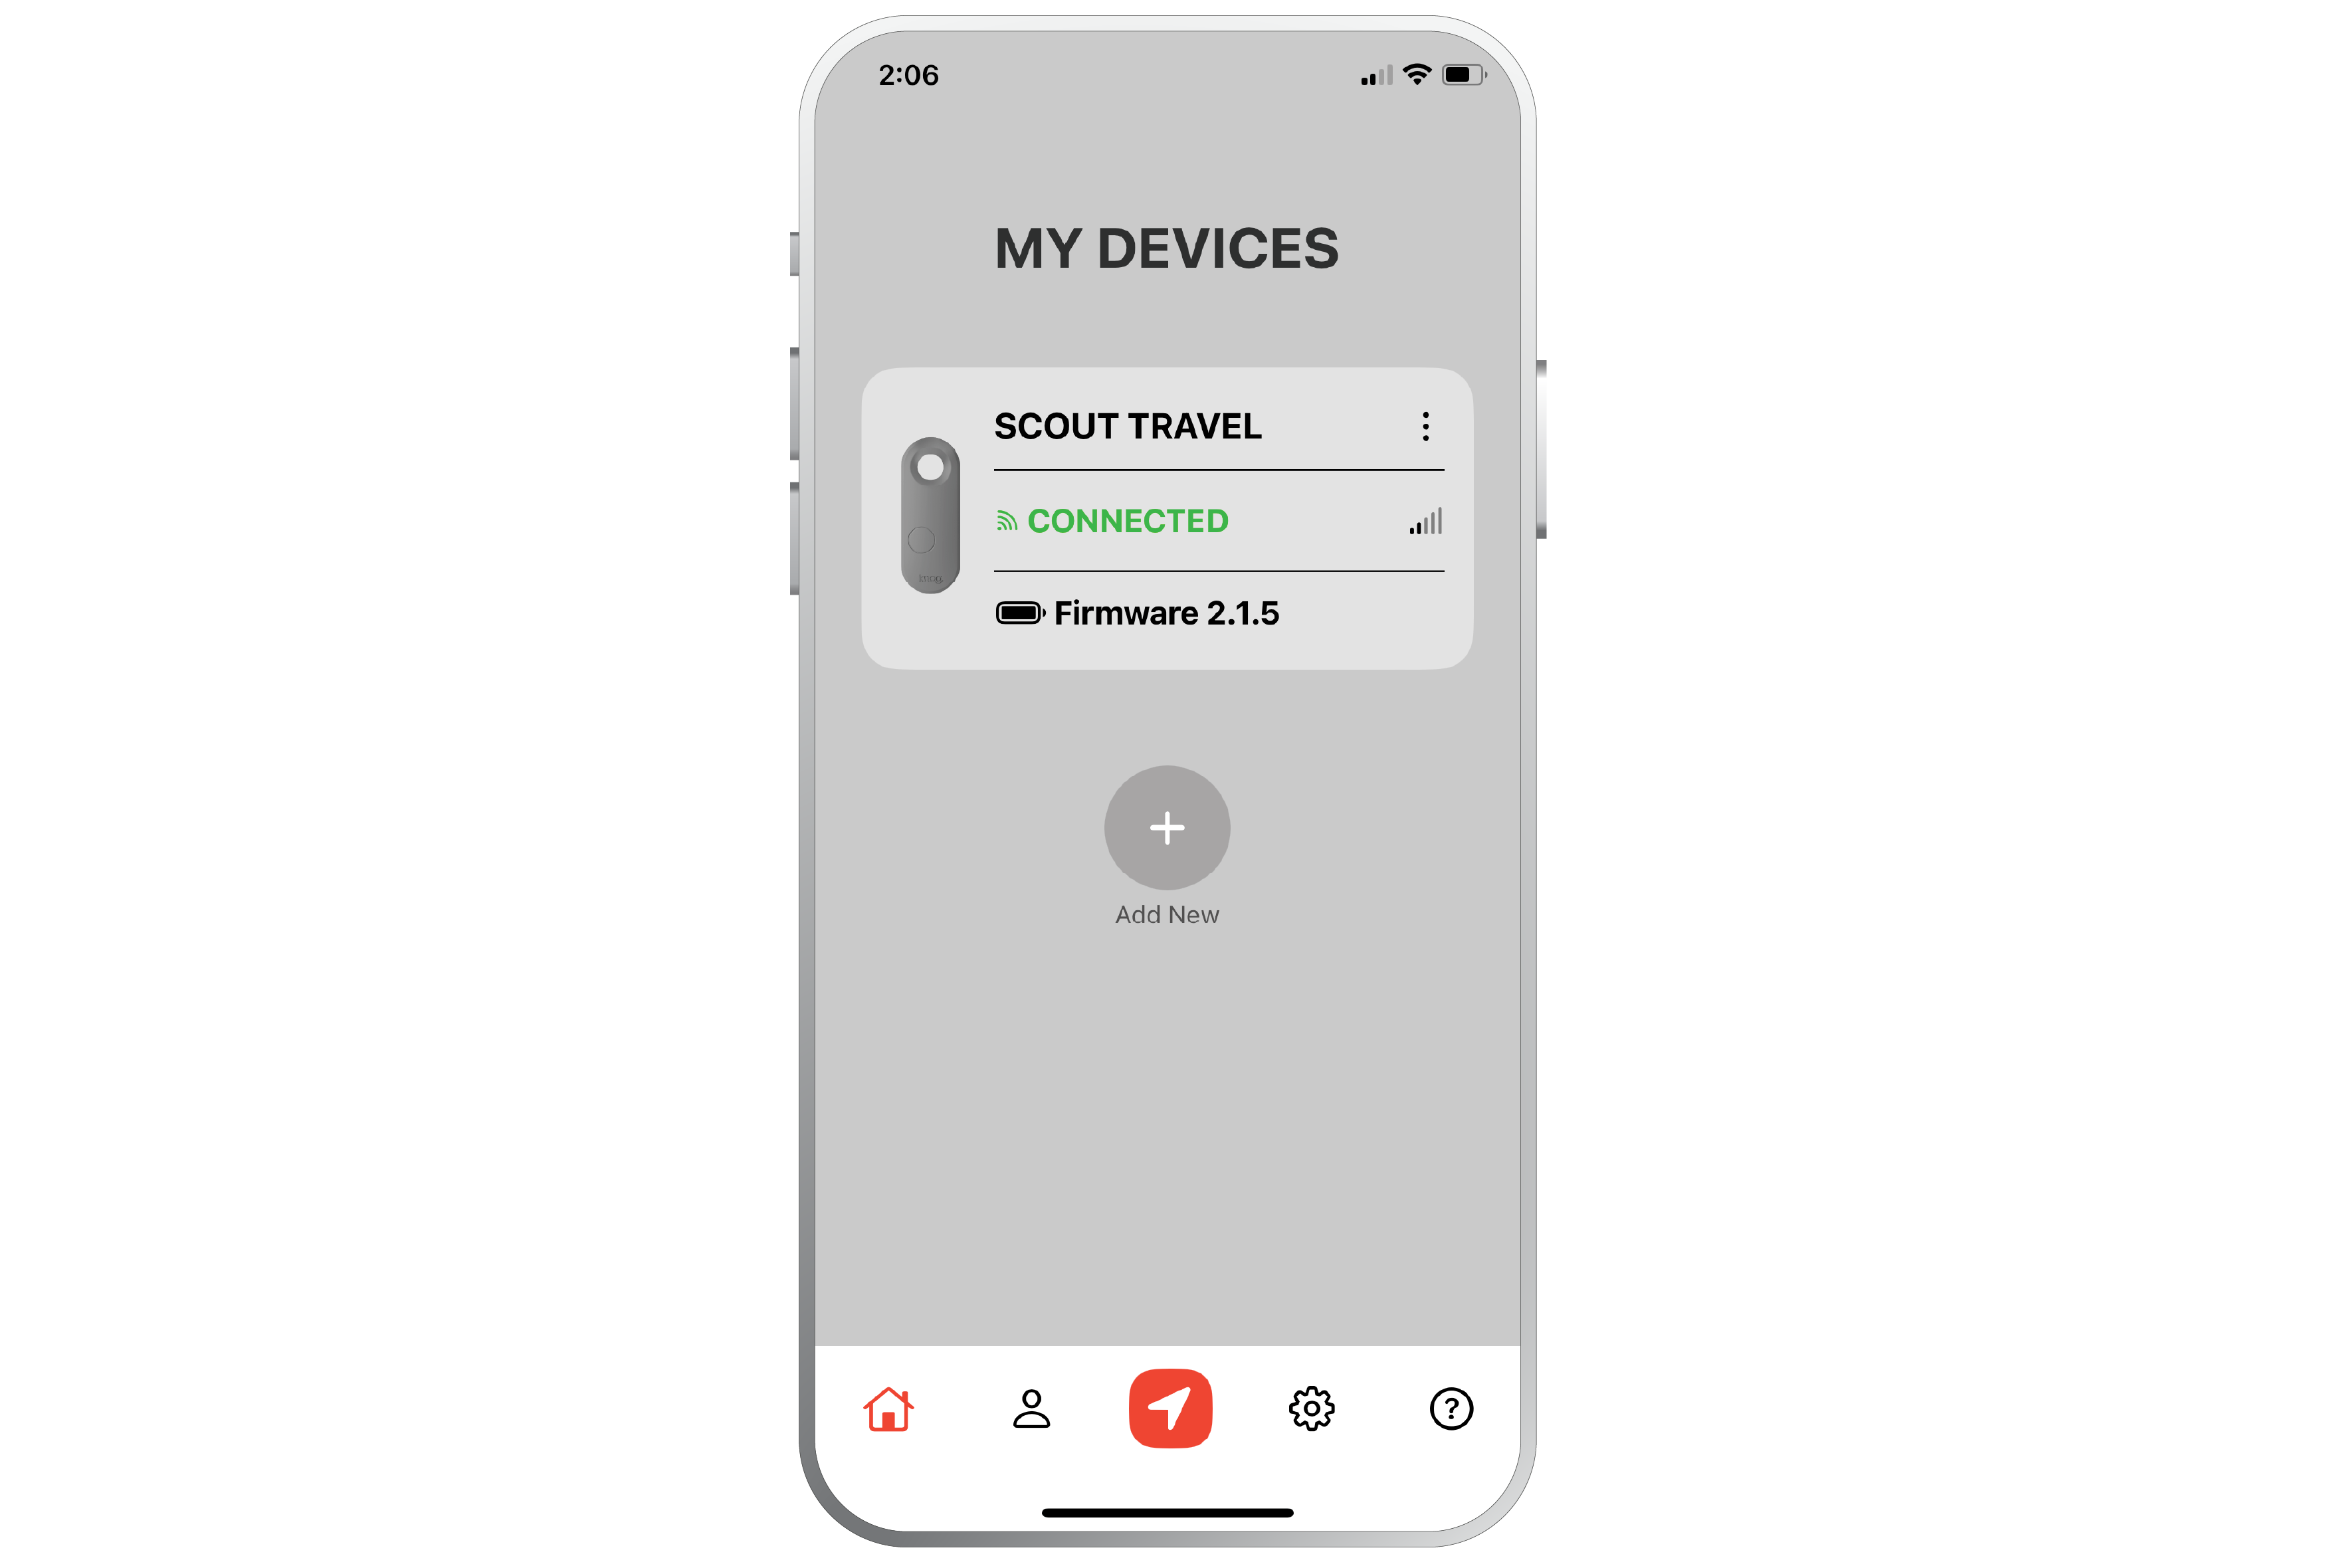
Step 4: Update Firmware
Once the Scout Travel is connected, inside the app select the 3 dots for more options. Scroll down, and select ‘Update Firmware’.
If the device has the most up-to-date firmware already installed, a message “You are up to date” will be displayed.
If a firmware update is available, download and install it to the Scout Travel.
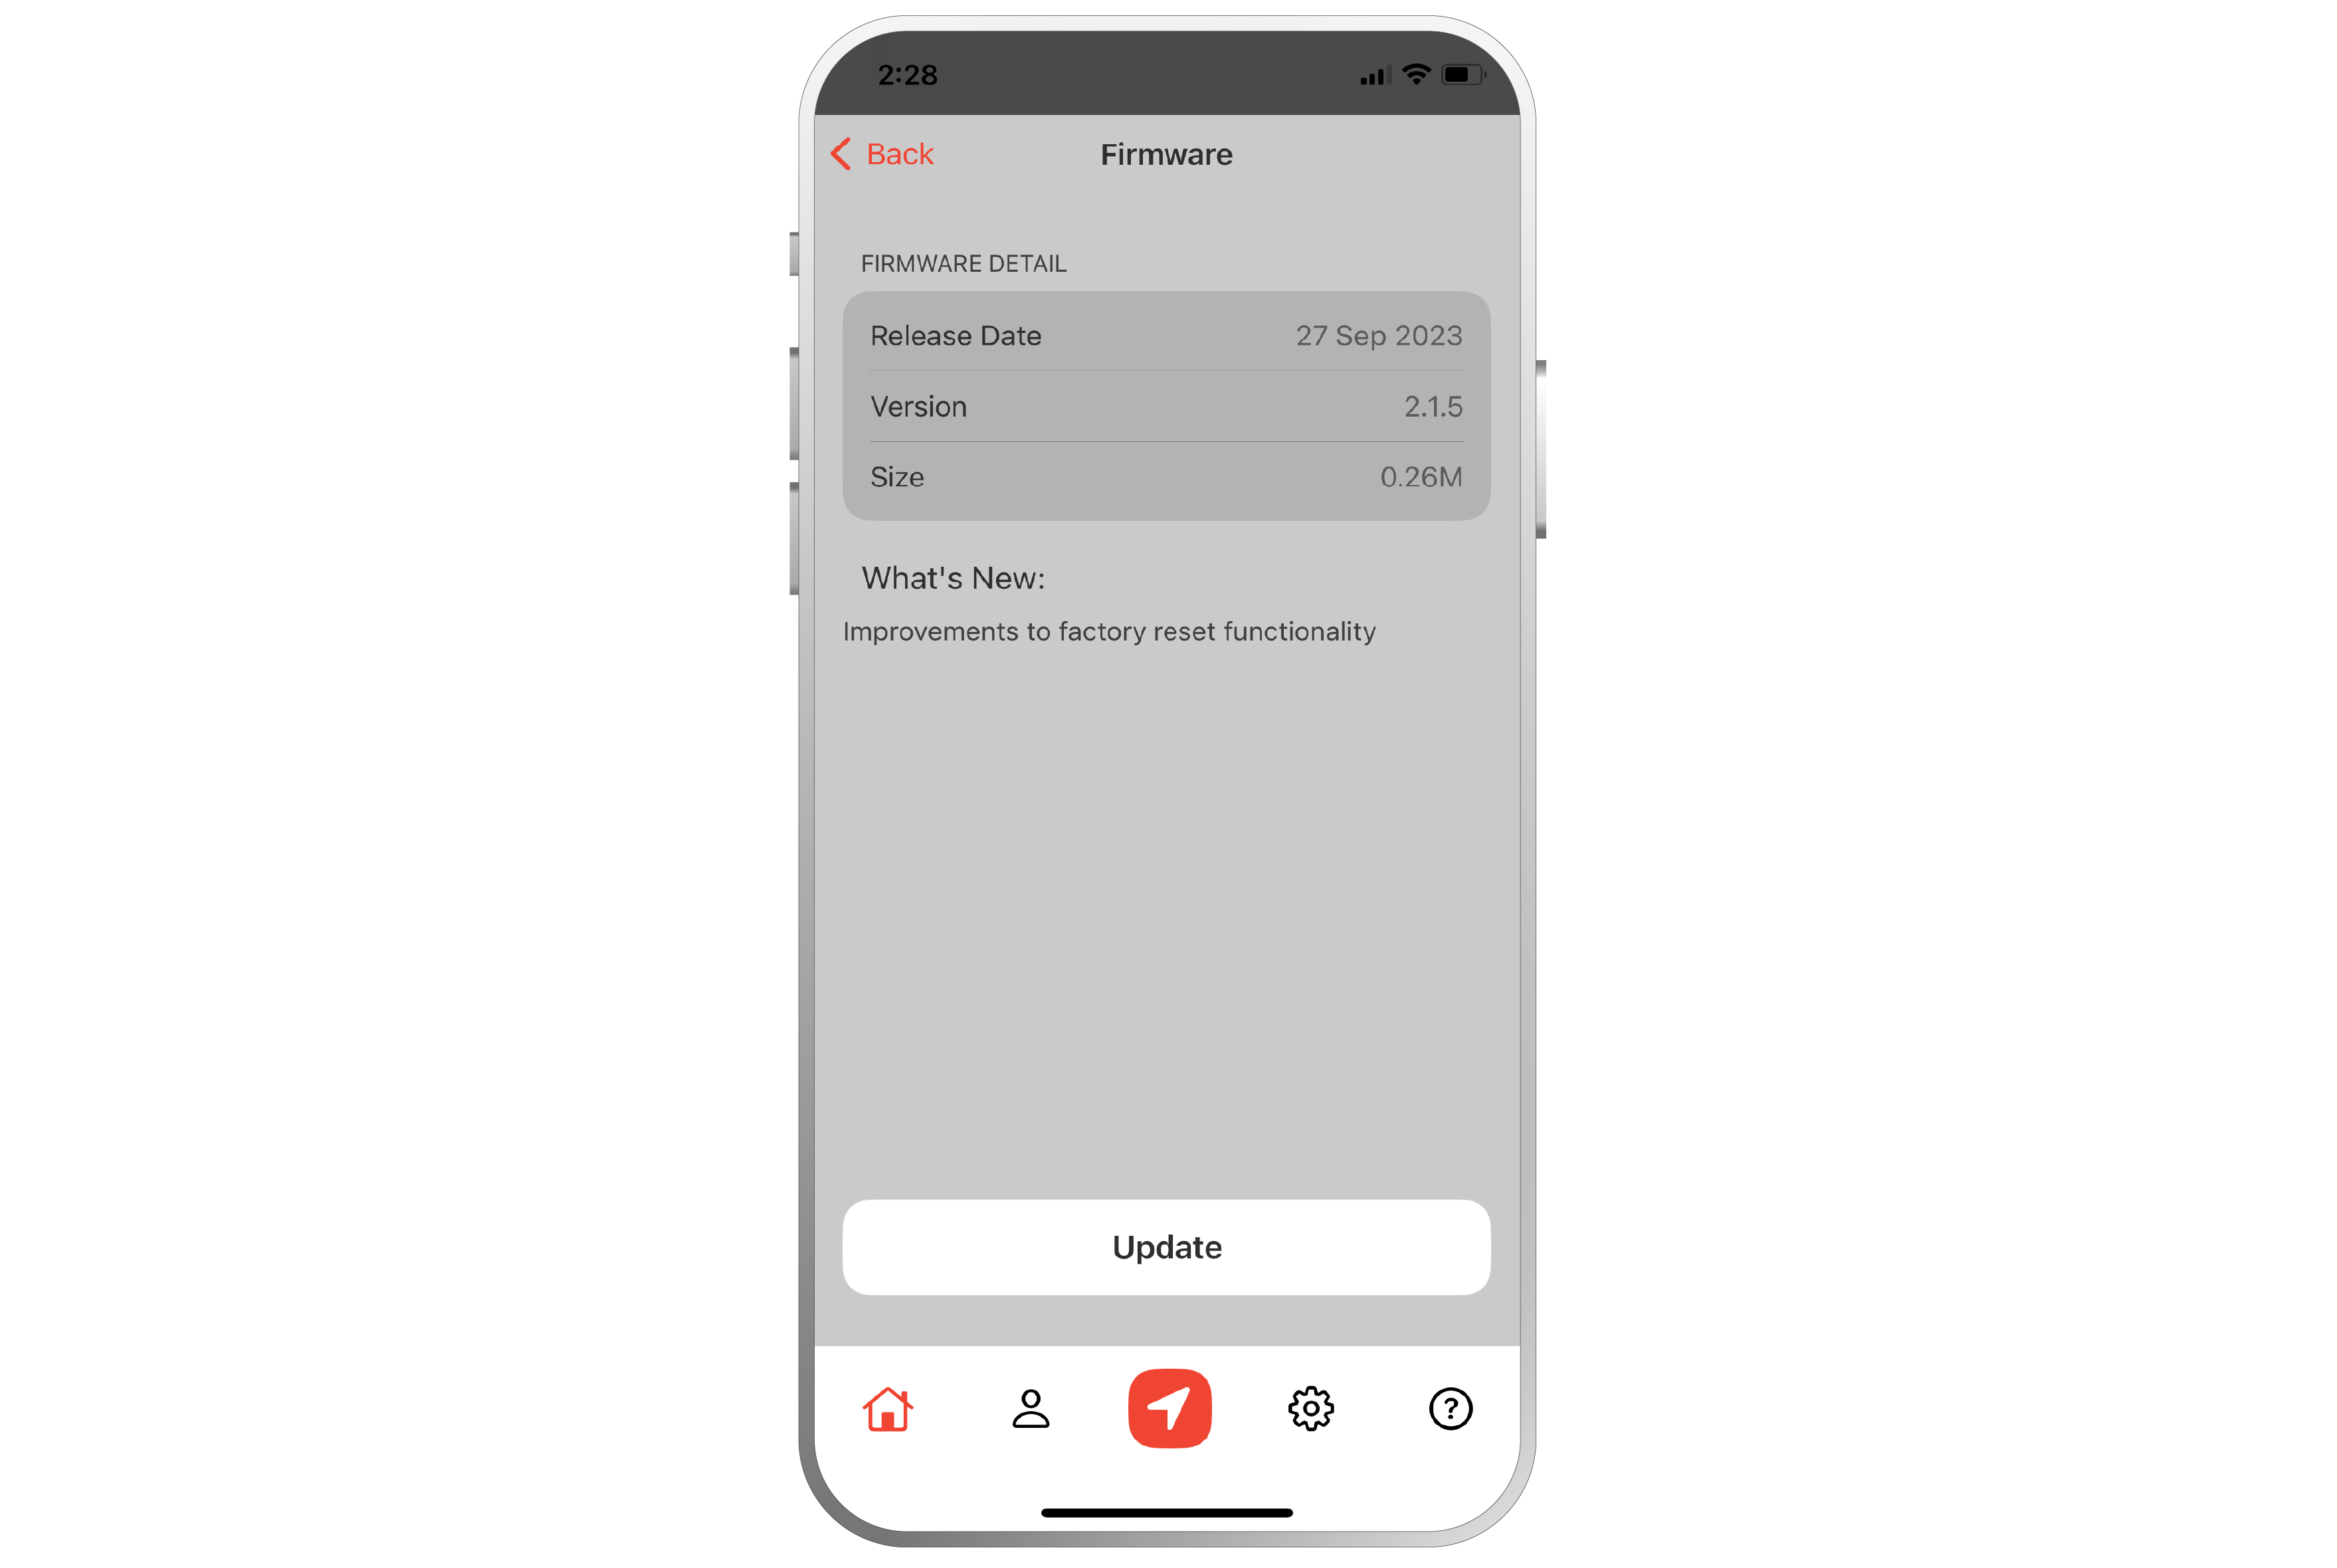
The firmware update process will begin, indicating the installation progress. If the user selects ‘Cancel’ at anytime, the Scout Travel will continue to use the existing version of firmware.
Once the firmware update is downloaded and installed, the Scout Travel will automatically reset to activate the update.
Once the firmware update process is complete, a green tick will be displayed.

Step 5: Connect to Find My
1. Open the Find My app by pressing the red arrow button at the bottom of the screen
*To use the Apple Find My app to locate this item, the latest version of iOS, iPadOS, watchOS, or macOS is recommended.

2. Press ‘Add New Item’
3. Select ‘Add Other Item’
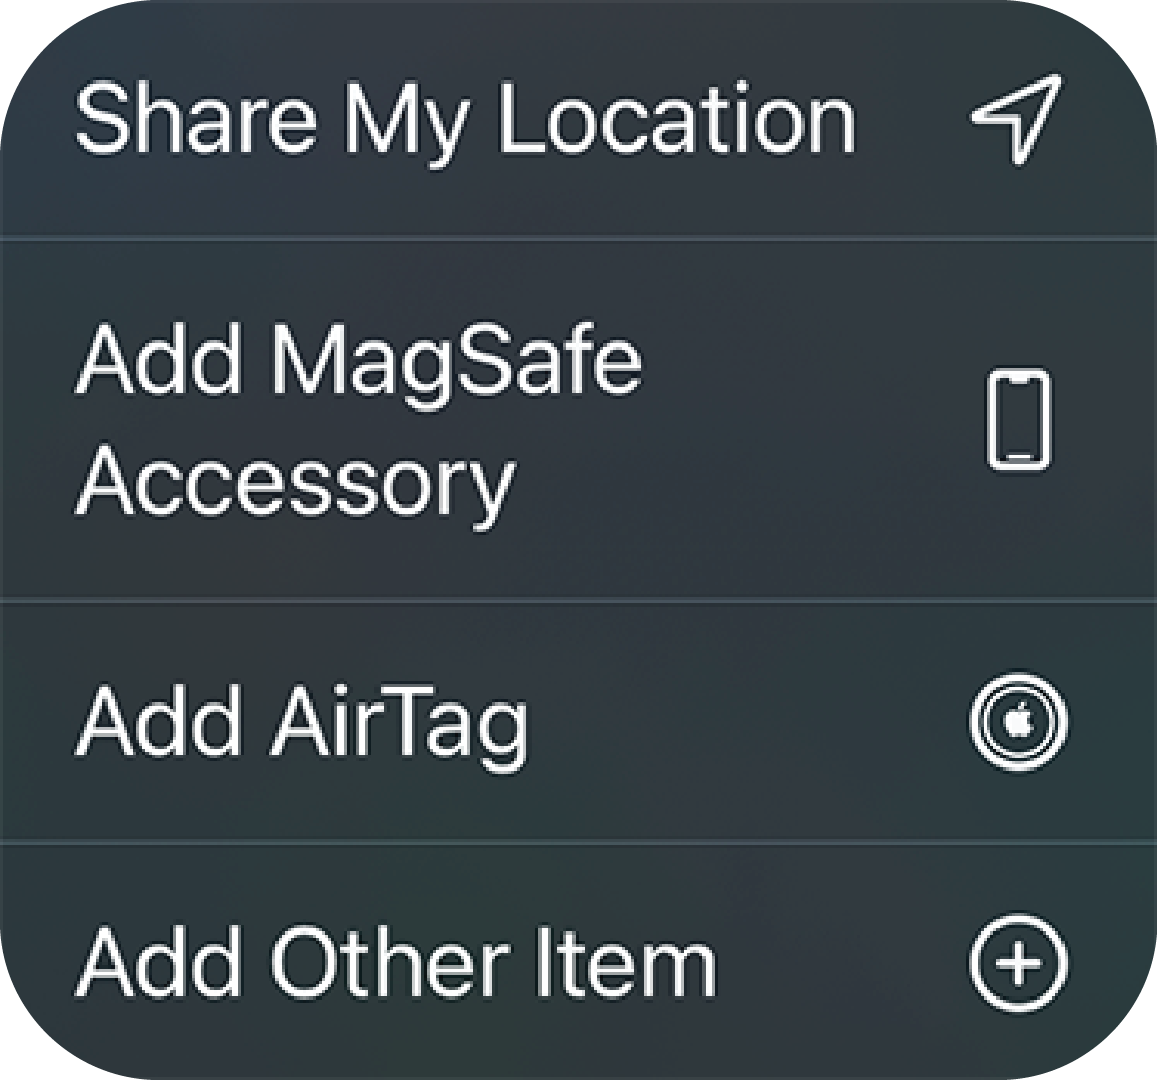
4. When the Scout appears, press to connect to Find My. Select and name your Scout Travel.
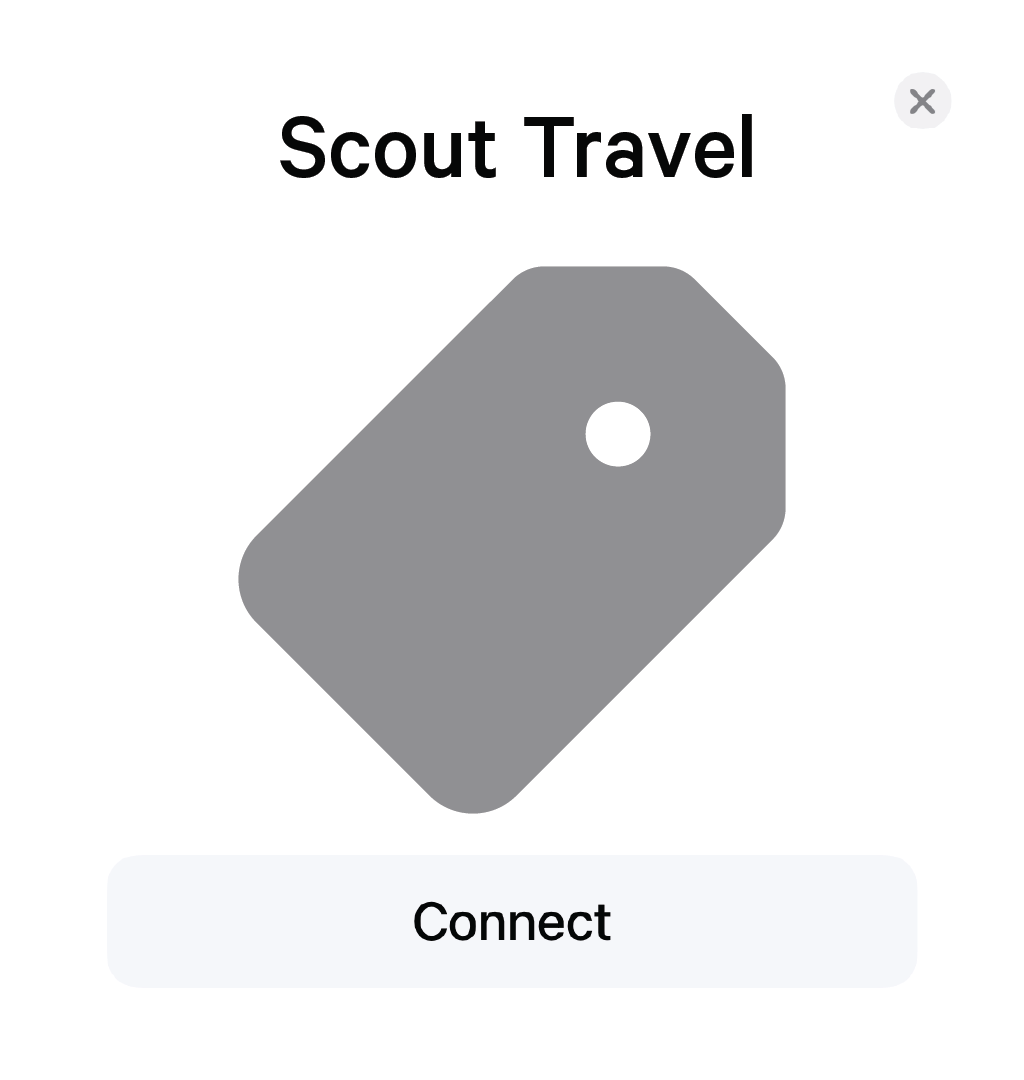
5. To finalise the Find My set-up, agree to the Apple Find My terms and conditions. Initiating, but failing to complete the set-up will result in an incomplete connection.
Step 6: Charging
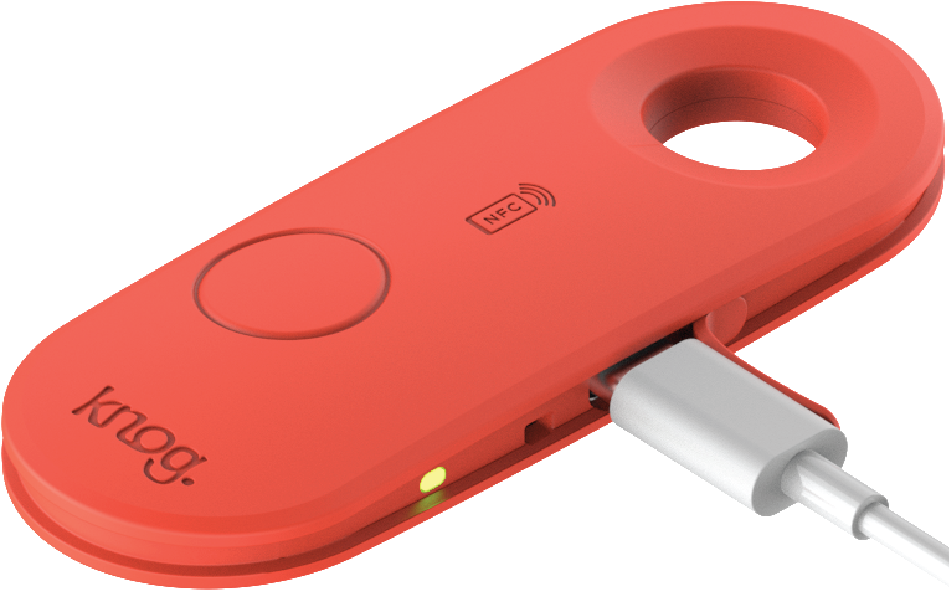
1. Open USB door seal

2. Plug in USB-C charging cable. Red LED indicates charging.

3. Green LED indicates fully charged.
Arming & Disarming From iPhone
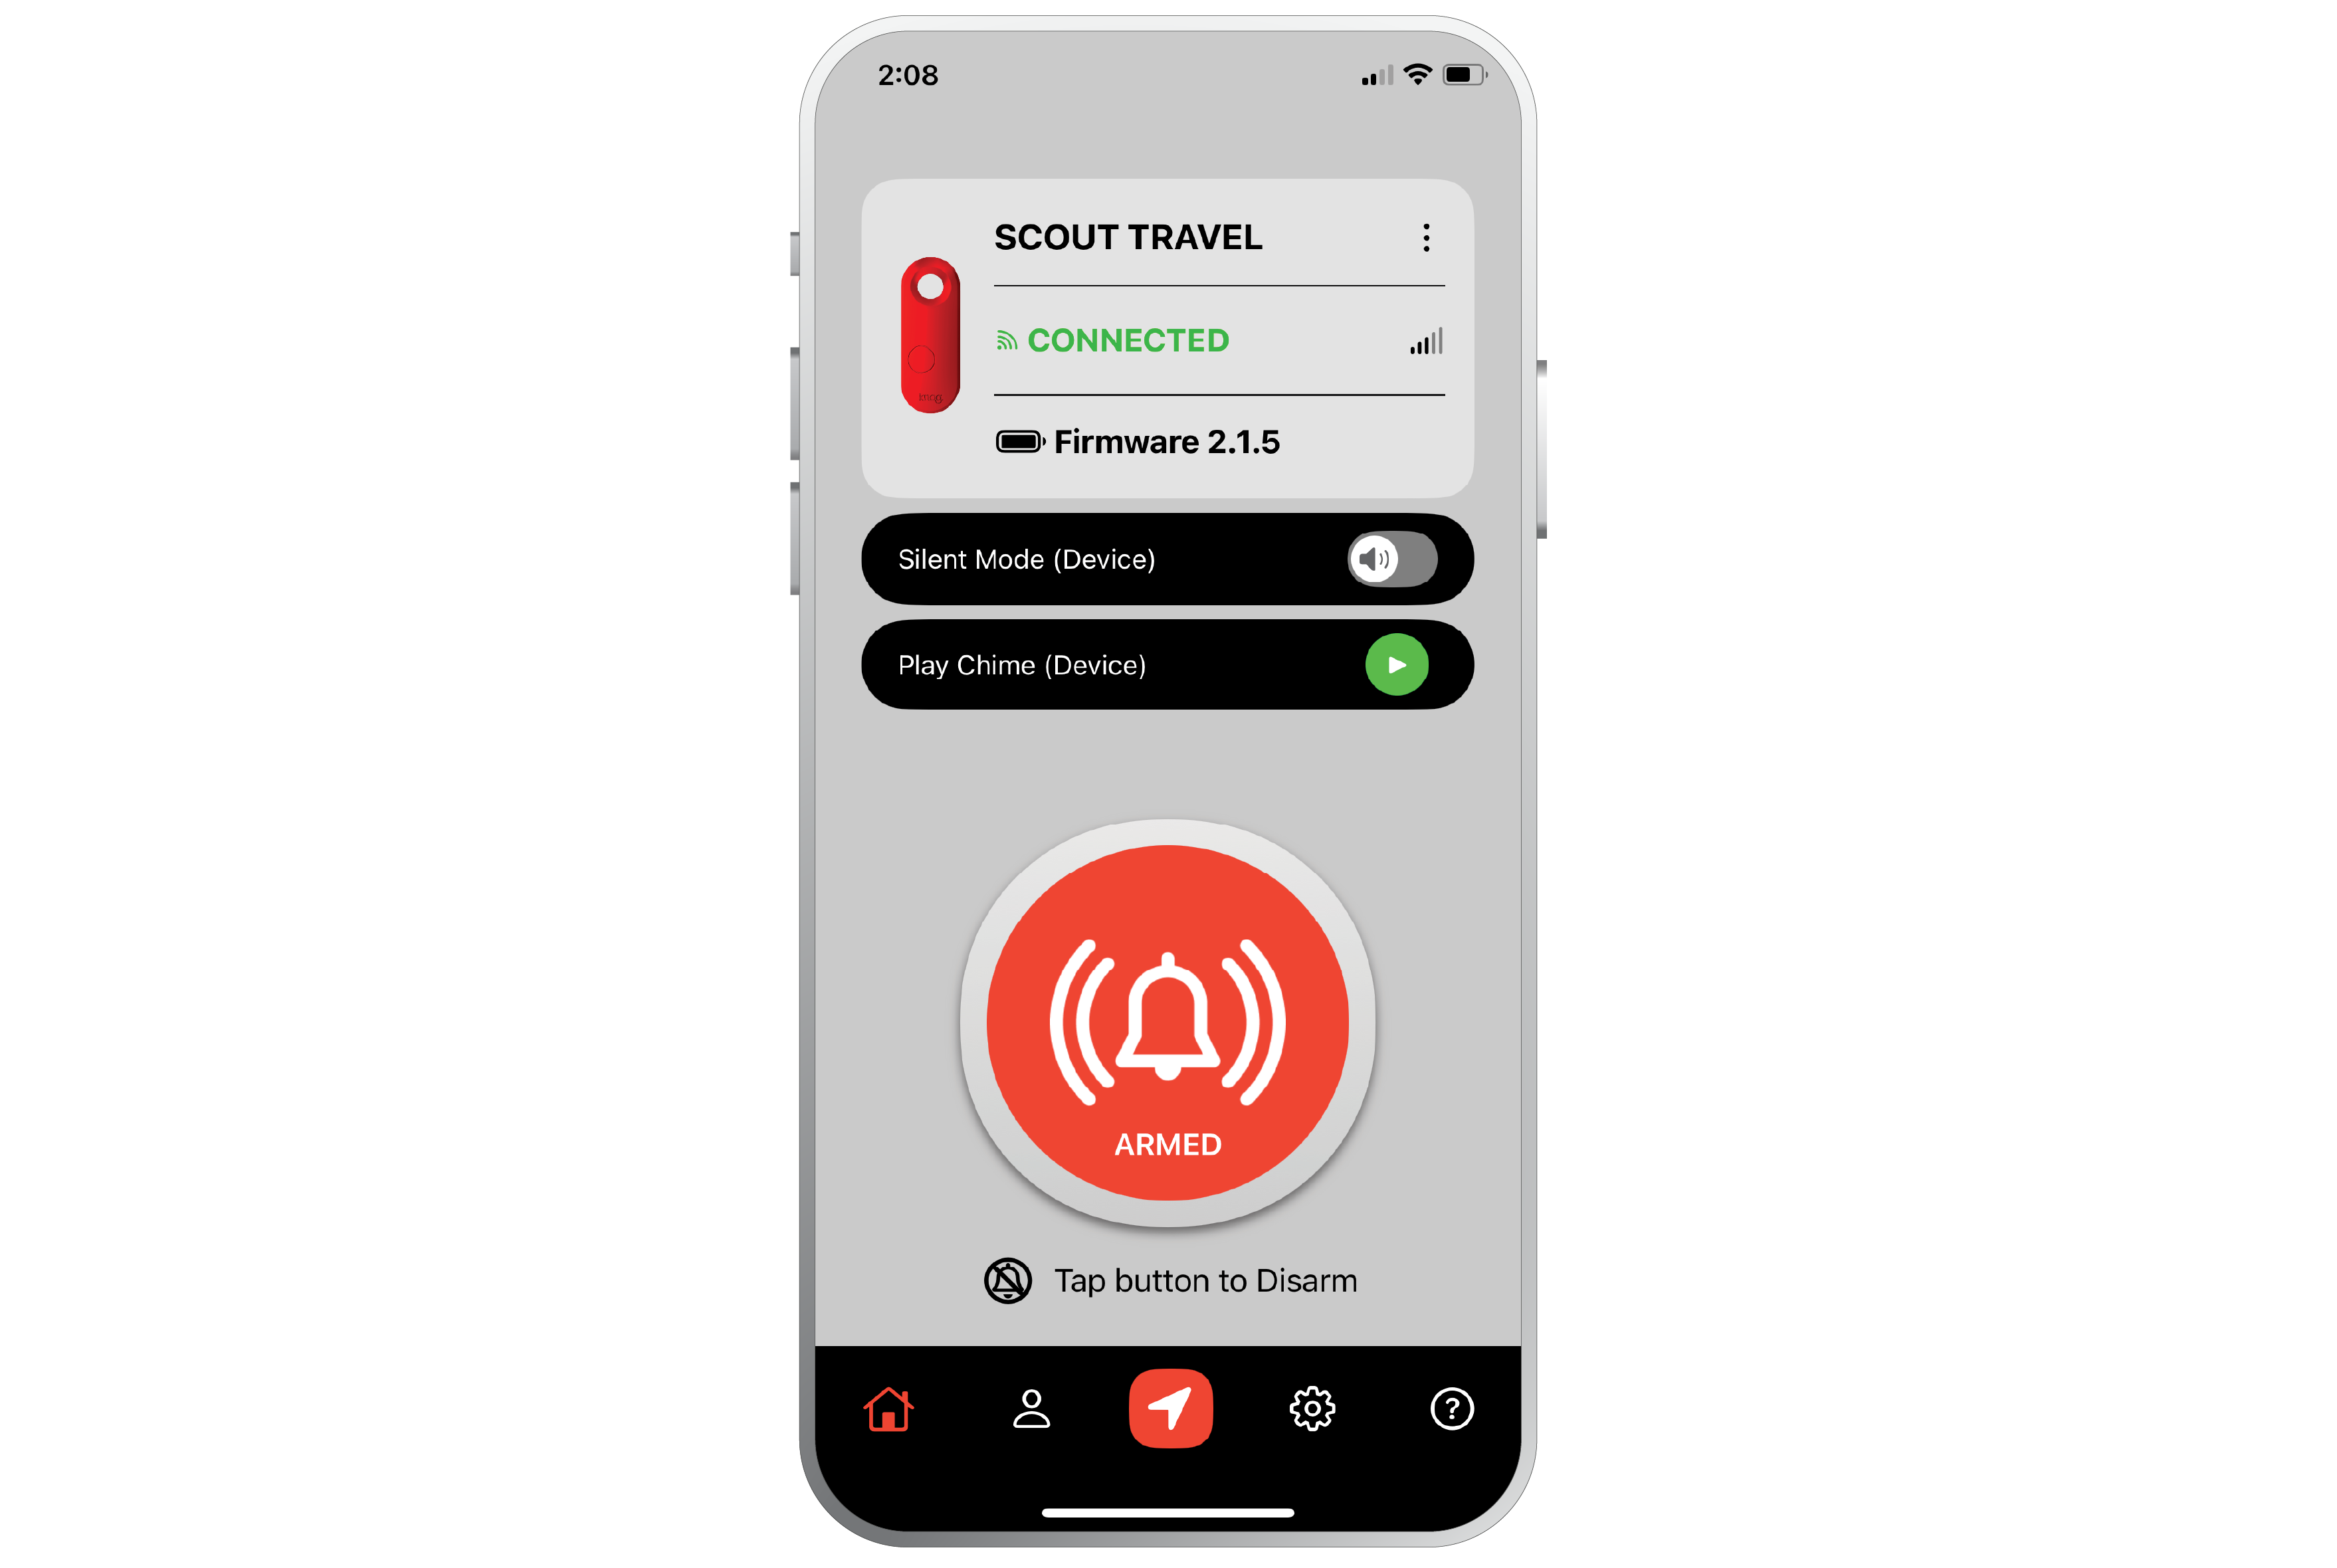
1. To arm the Scout Travel make sure the phone is in Bluetooth range. The Scout Travel should show ‘Connected’. Press the large bell icon on screen to arm the Scout.

2. The bell icon button will now show the Scout Travel is Armed. To Disarm, make sure the Scout Travel is in Bluetooth range, and press the bell icon on the screen.
Arming From The Scout Travel
1. To arm the Scout Travel, make sure the phone is in very close range range and the Knog app is active.
2. Press and hold the button on the Scout for 1 second to begin arming.
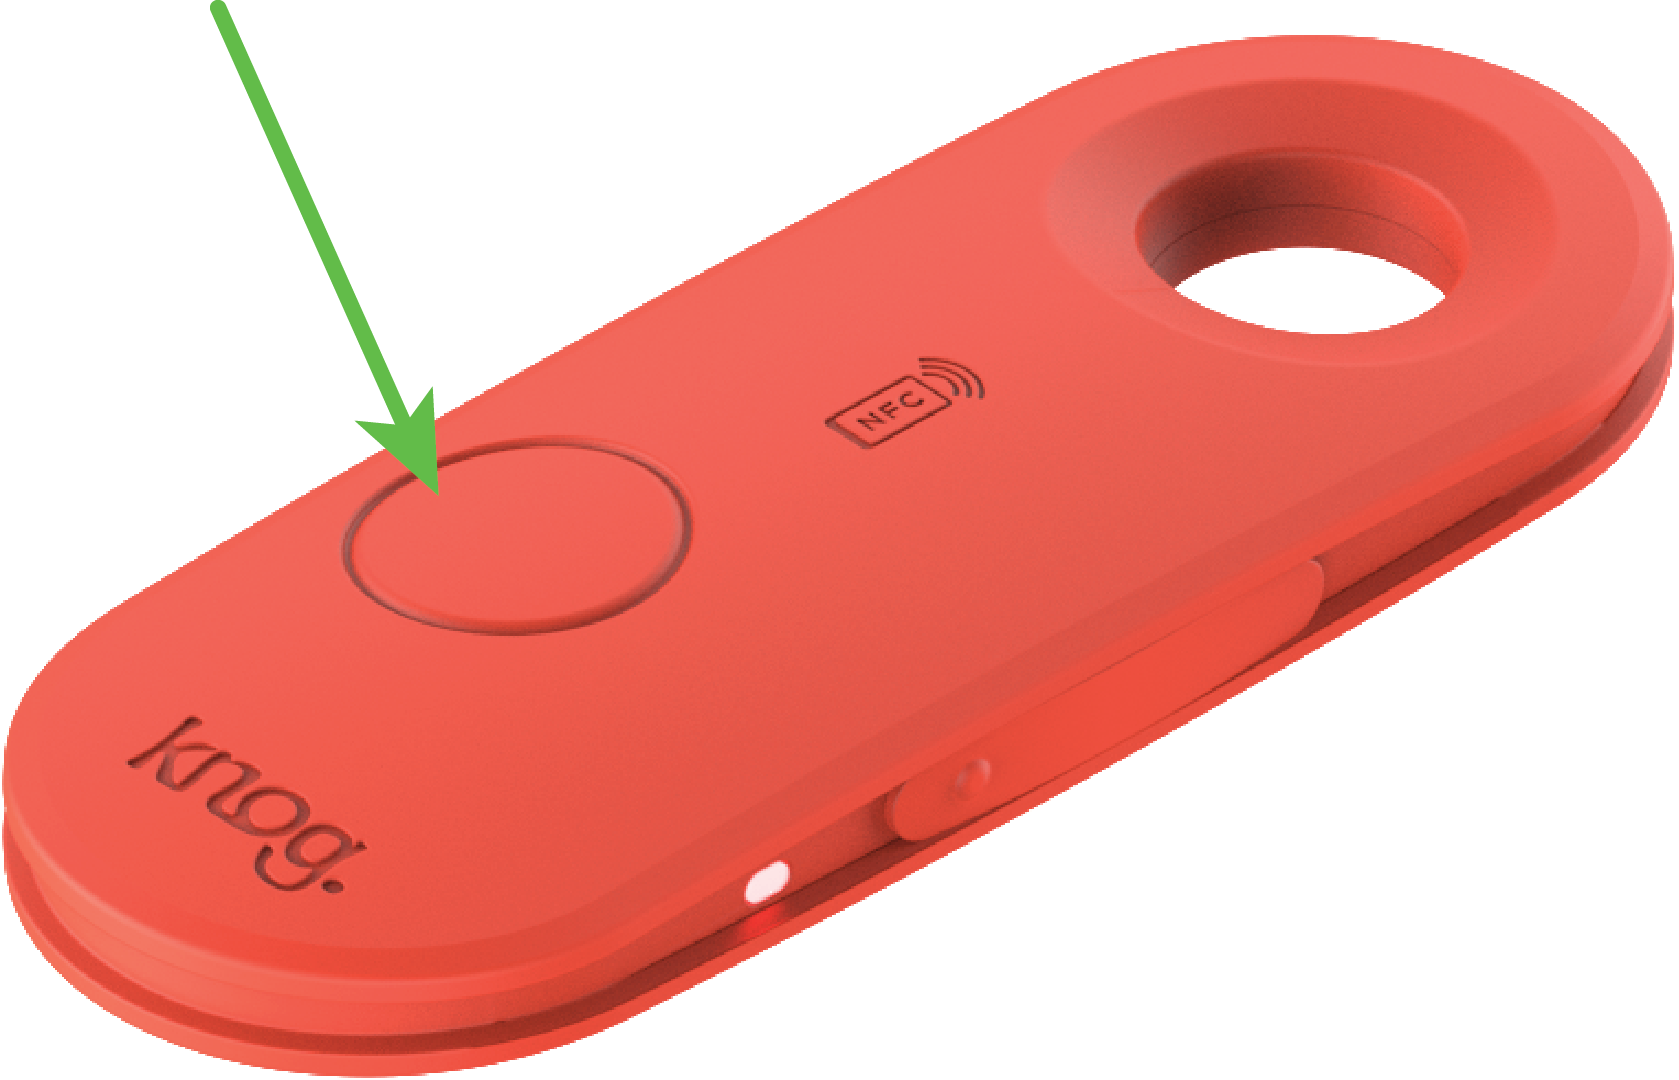
3. Whilst the Scout Travel is arming, the indicator LED will flash red momentarily and the bell icon will appear yellow in the app.
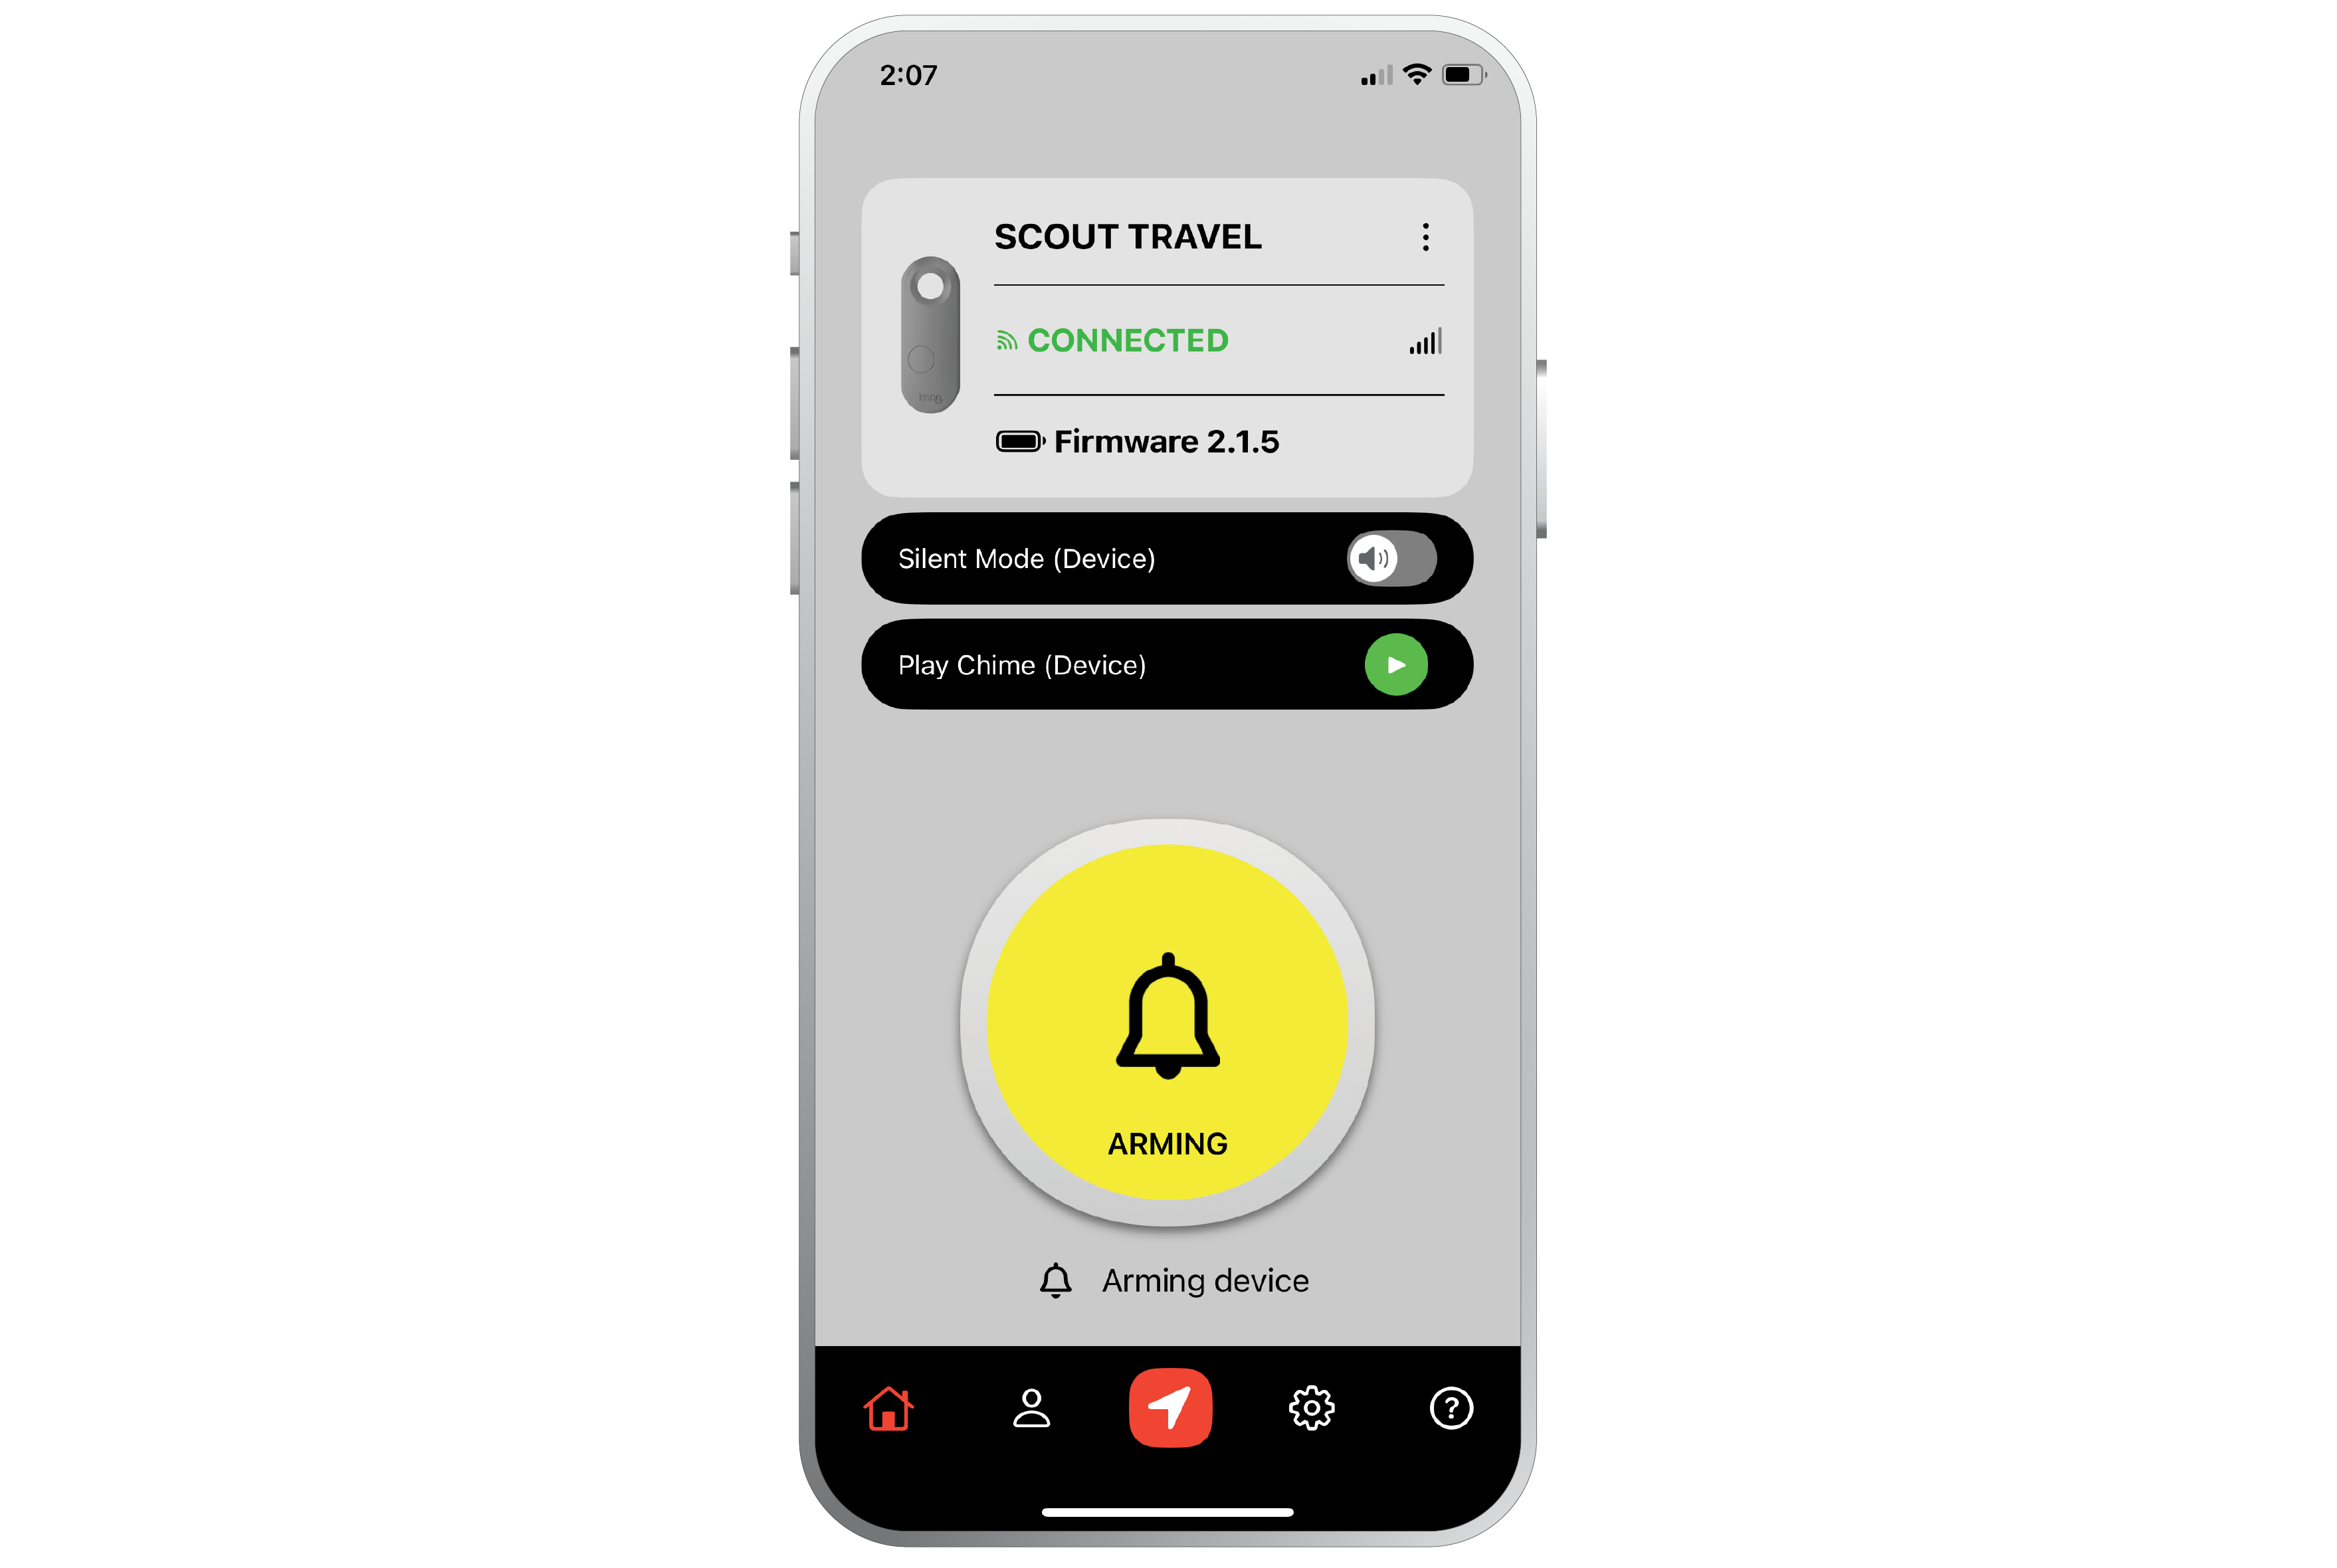

Scout Travel cannot be armed unless phone is in very close range. (Approx 1m / 3 ft)
Disarming From The Scout Travel
1. To disarm the Scout Travel make sure the phone is in very close range and the Knog app is active on the phone.

2. Press and hold the button on the Scout Travel for 1 second to disarm.


Scout cannot be disarmed unless phone is in very close range. (Approx 1m / 3 ft)
Disable Find My
Note: This is NOT describing the method to remove your Scout Travel from the Find My app.
If you receive an Apple Unwanted Tracking notification, the owner of the Scout in your presence can view it’s location. Follow these instructions to stop sharing location details of the Scout Travel.
1. Place the Scout on its side with the USB-C port facing upwards.
2. Press and hold the button for 30 seconds until 4 short beeps are heard.
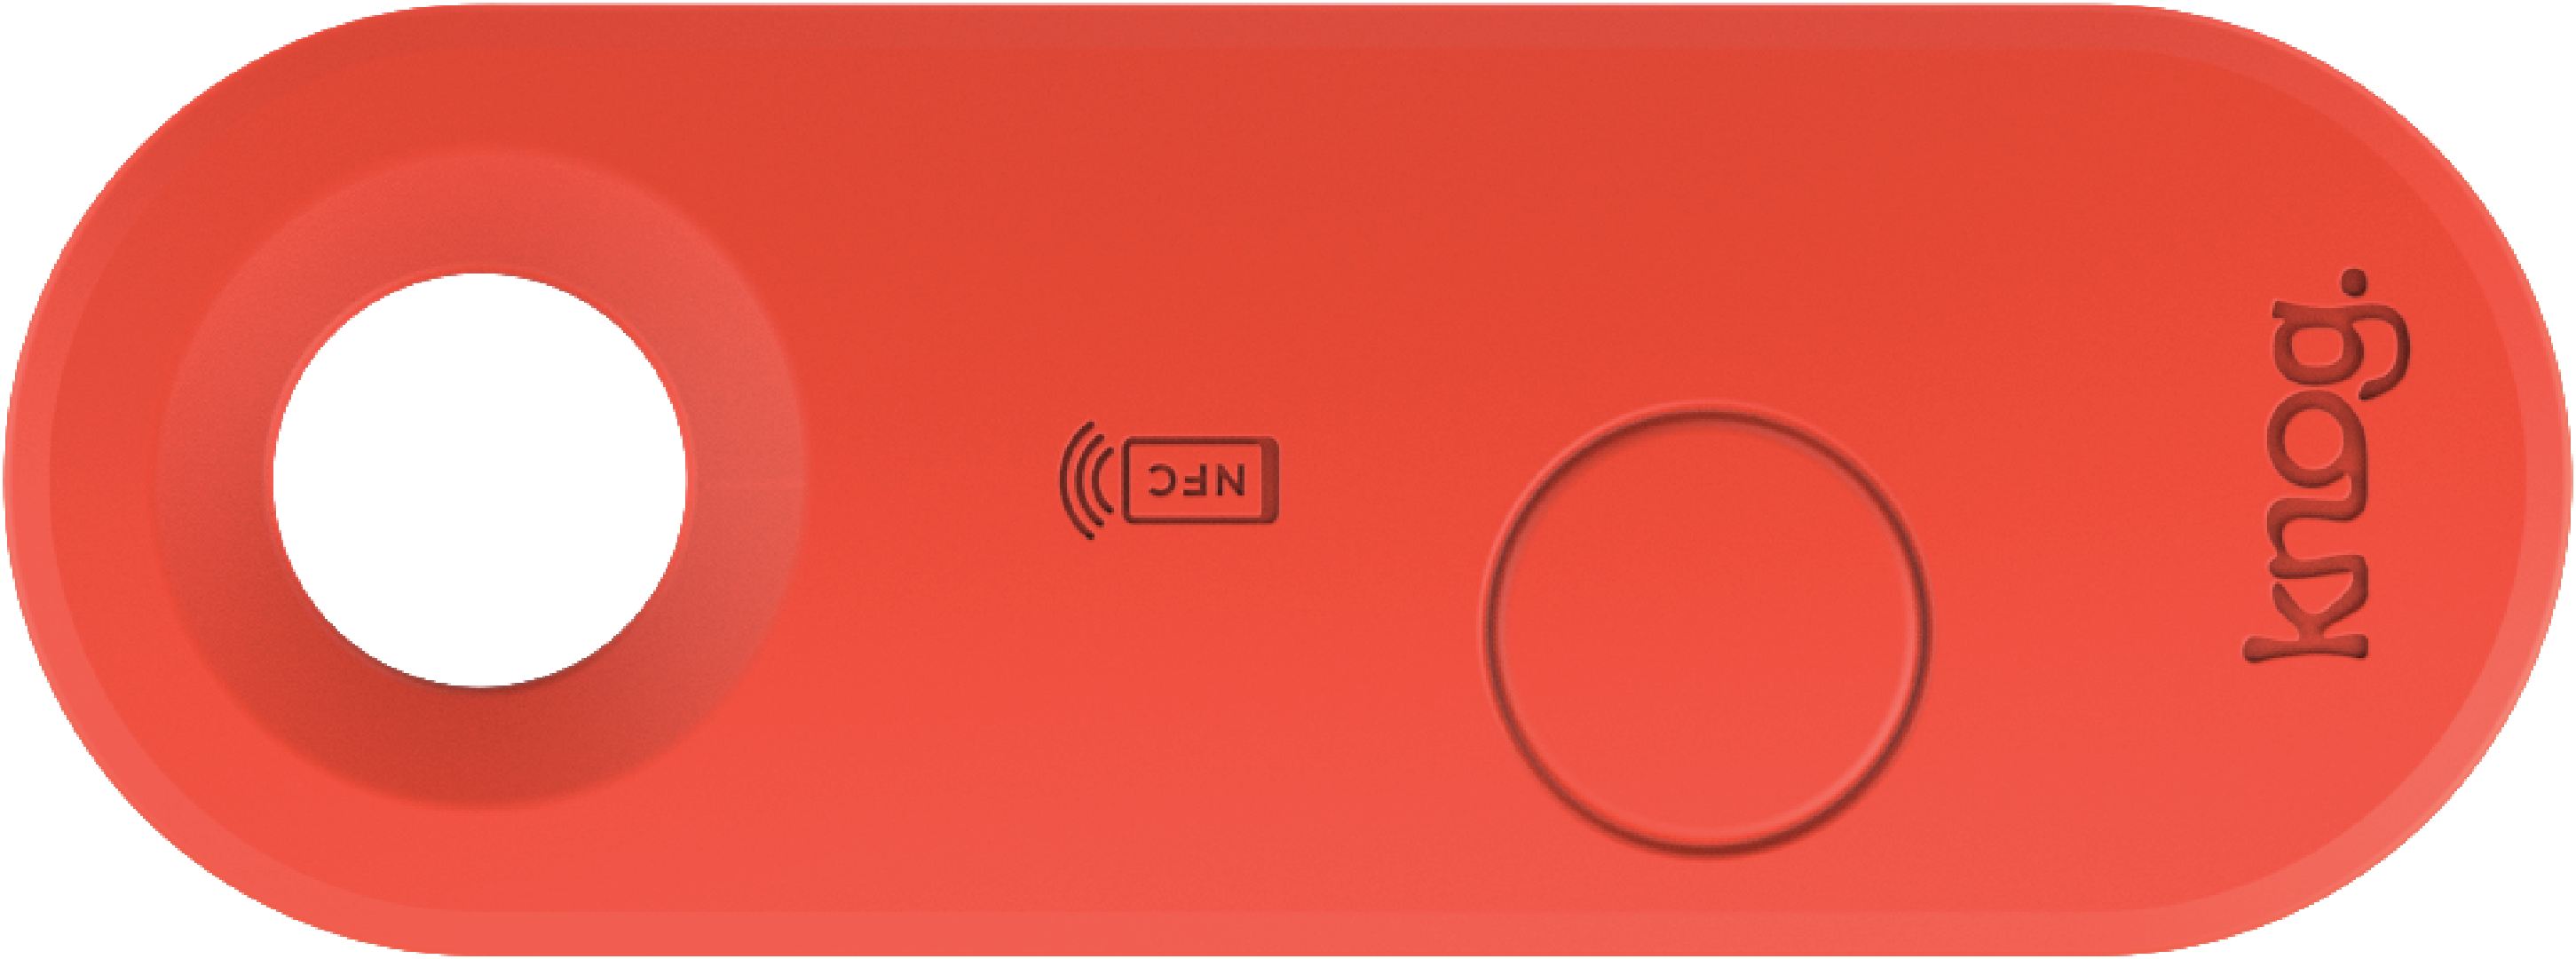
This procedure will stop sharing the location of the Scout Travel.
Plugging the Scout Travel into a charger will re-enable location sharing.
Troubleshooting
In any case where the Knog app or Scout Travel is non-responsive, try the following steps before attempting a factory reset.
1.) Plug in your Scout Travel via the USB-C until a green light indicates the Scout Travel is fully charged.
2.) Quit Knog app on iPhone -> Swipe up from the bottom of your screen, bringing the app into the centre. Swipe up again to close.
3.) Make sure you have the latest version of the Knog app installed.
4) Reconnect the Scout Travel to a USB-C charger to enable pairing.
For further troubleshooting information, please refer to the ‘help’ page inside the Knog app and follow the FAQs link.
To correctly remove the Scout Travel from your phone - if transferring to another user or moving your Scout Travel to a new phone - or if a fresh start is needed for some other reason, follow the process below.

It is critical that the Scout Travel is disarmed before step 1.
If this is not done, the Scout Travel may be rendered inoperable.
1. Remove Knog Mobile app connection
A. Open iOS->Settings->Bluetooth, and find the Scout Travel connection. Select the marker next to the connection. If you have more than one Scout, move to a position where only the Scout you would like to remove is in range and shown as Connected.
B. Select ‘Forget This Device’.
C. Open the Knog app, and remove the Scout Travel.
2. Remove Scout Travel from Find My Network
A. Open the Find My app, and select the Scout you would like to remove. Scroll down, and select the Remove Item option as showed below. The Knog Scout is no longer registered with Find My after this step.
3. Factory Reset on Scout
A. Place the Scout Travel on its side with the USB-C port facing upwards.

B. Press and hold the button, while plugging in a USB-C cable. Continue to hold the button for 10 seconds, until 3 long beeps are heard.
Serial Number Look Up
The Apple Find My app can be used to lookup the serial number
of an unknown Scout Travel in your possession.
1. In the Find My app, select Identify found item, when the unknown Scout Travel is nearby.
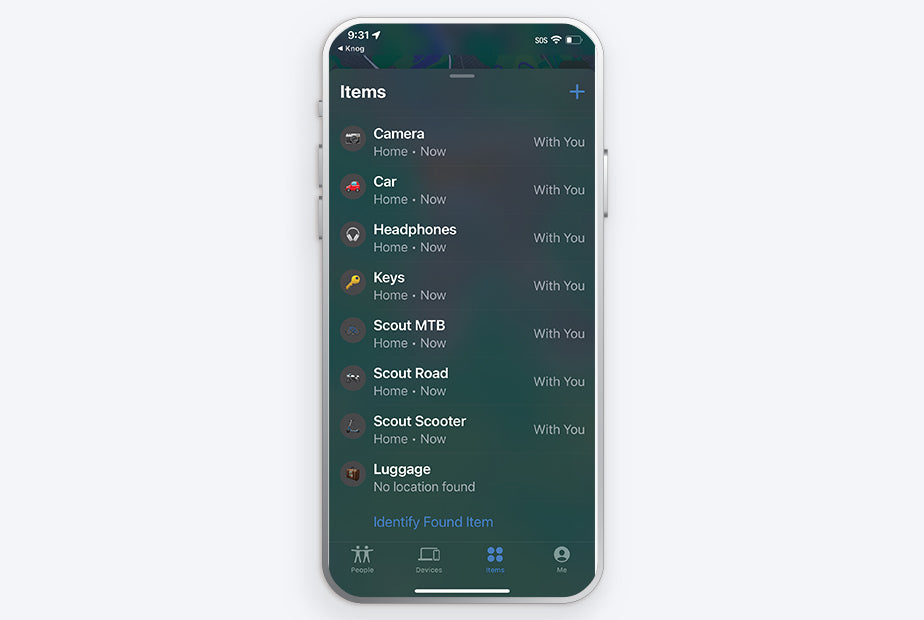
2. Select the item from a list of nearby items, then press continue.

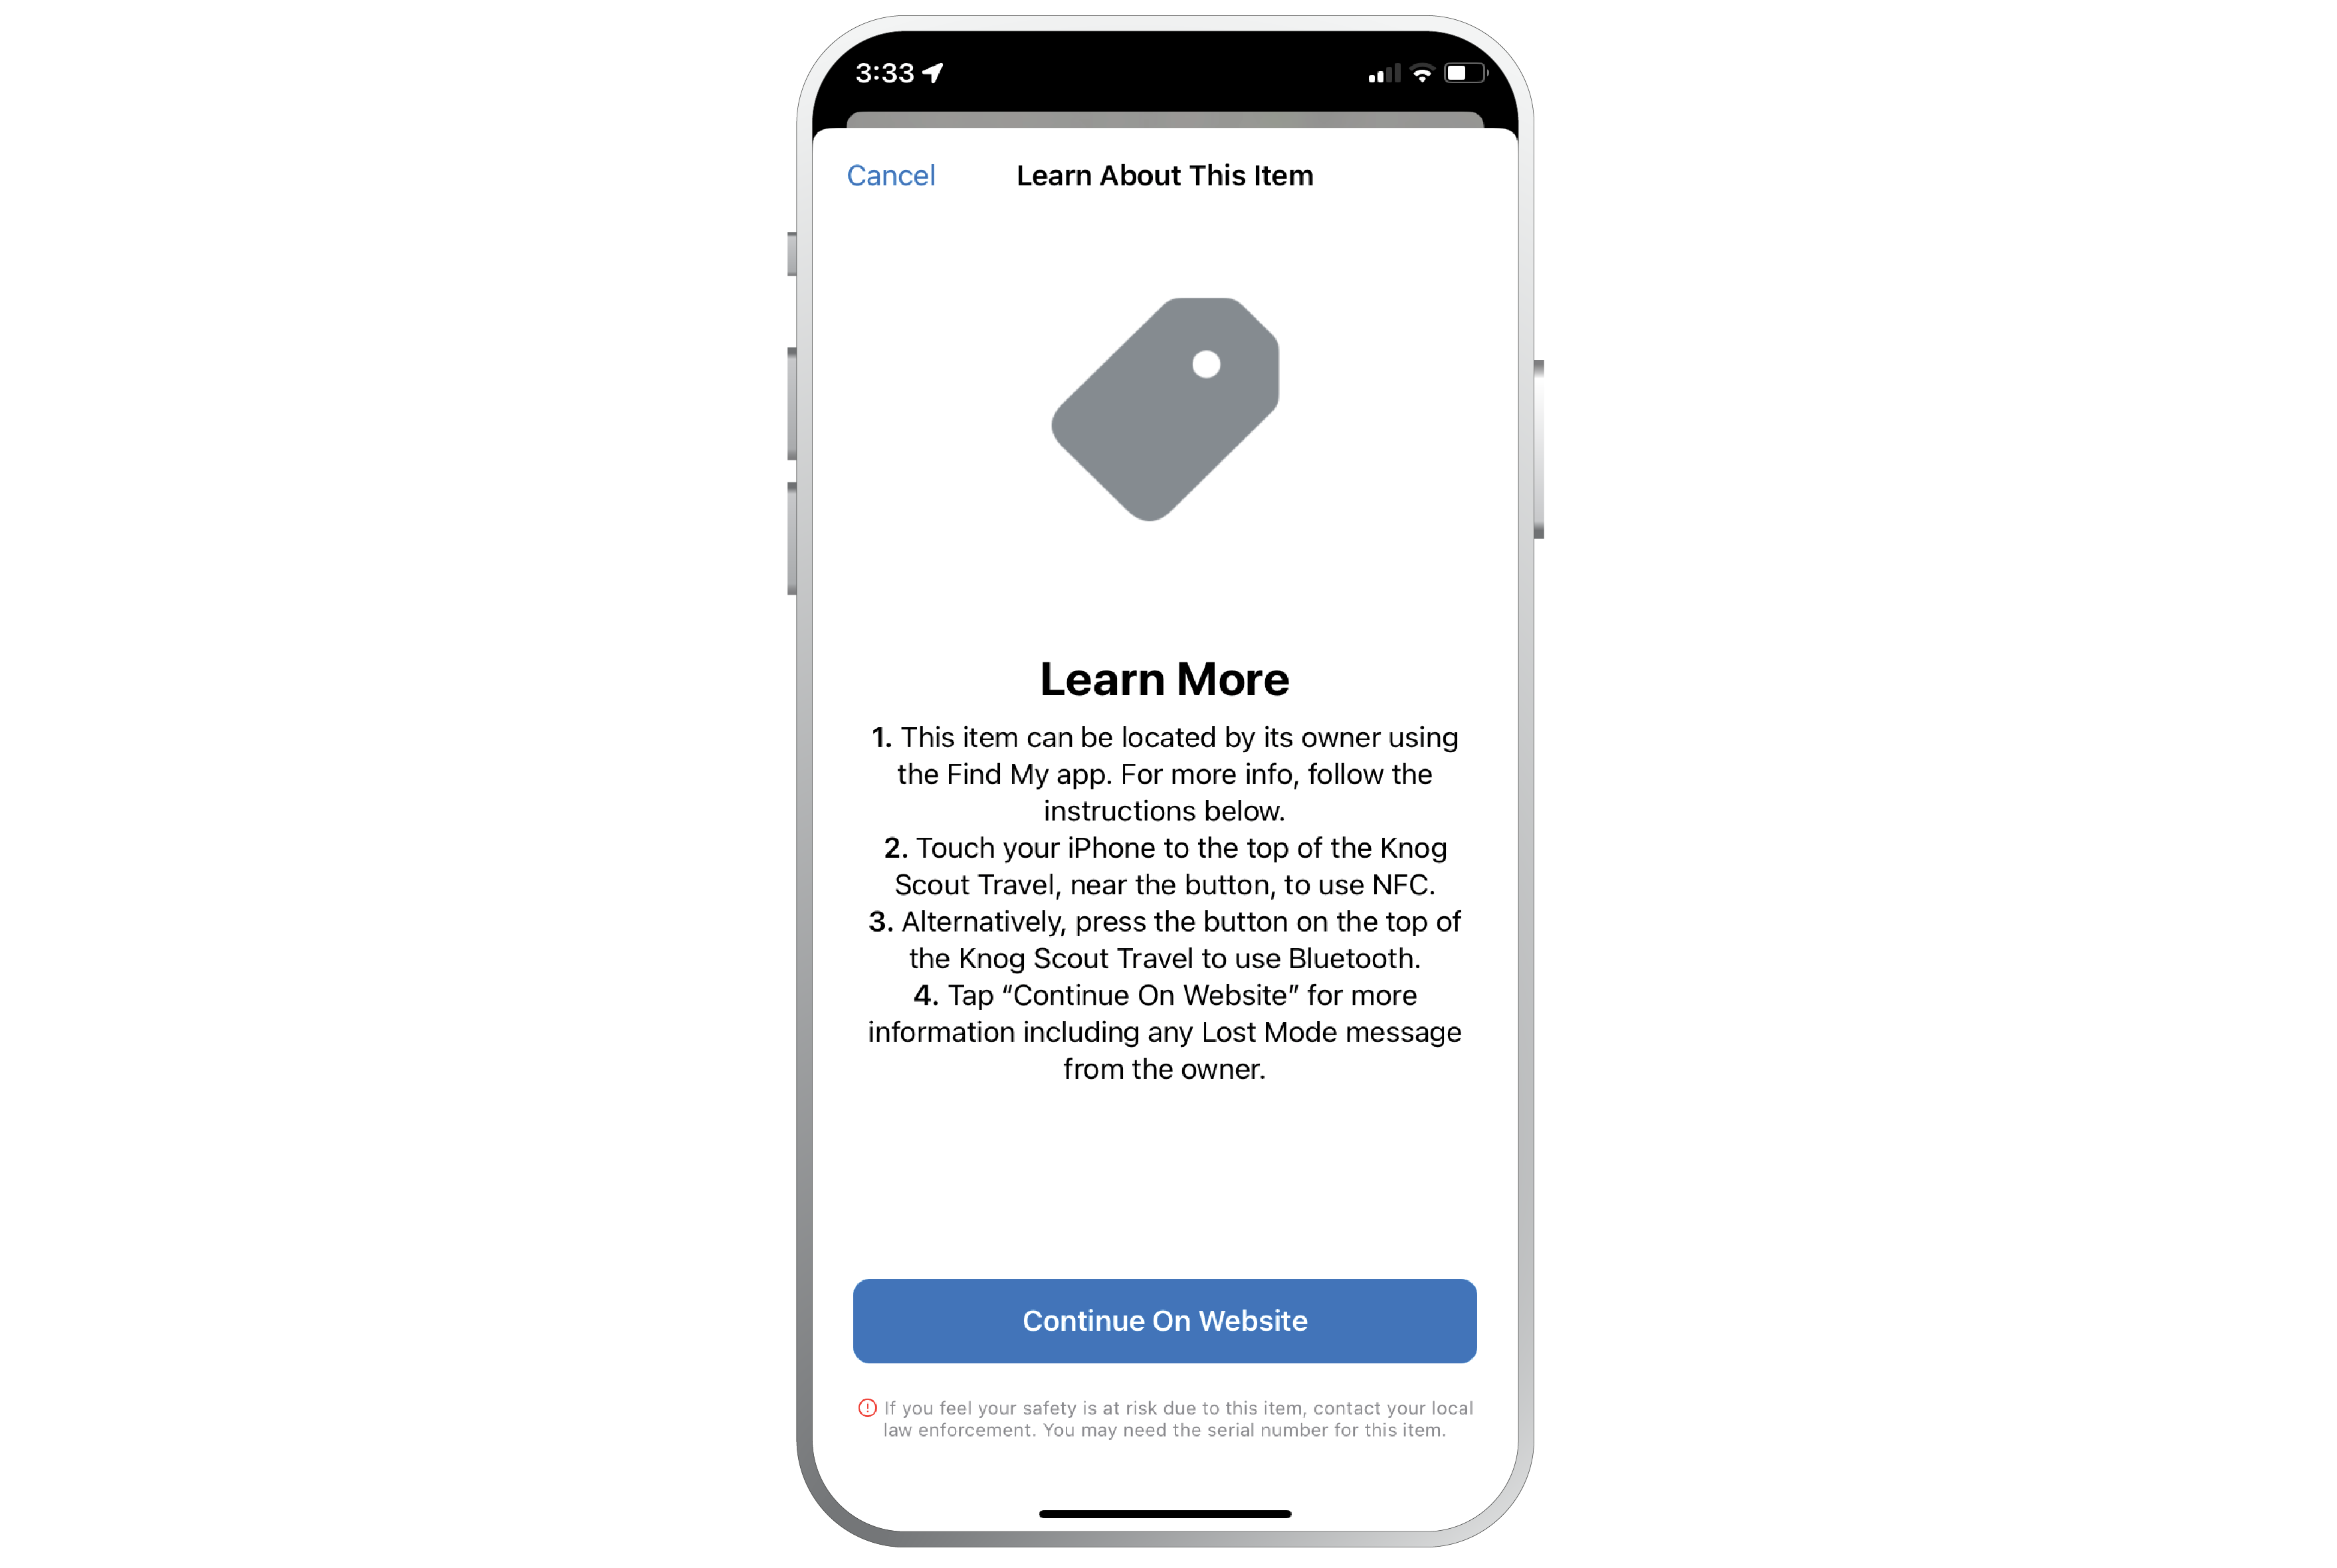
3. When the following page is displayed, press the button on the Scout, then select ‘Continue On Website’.
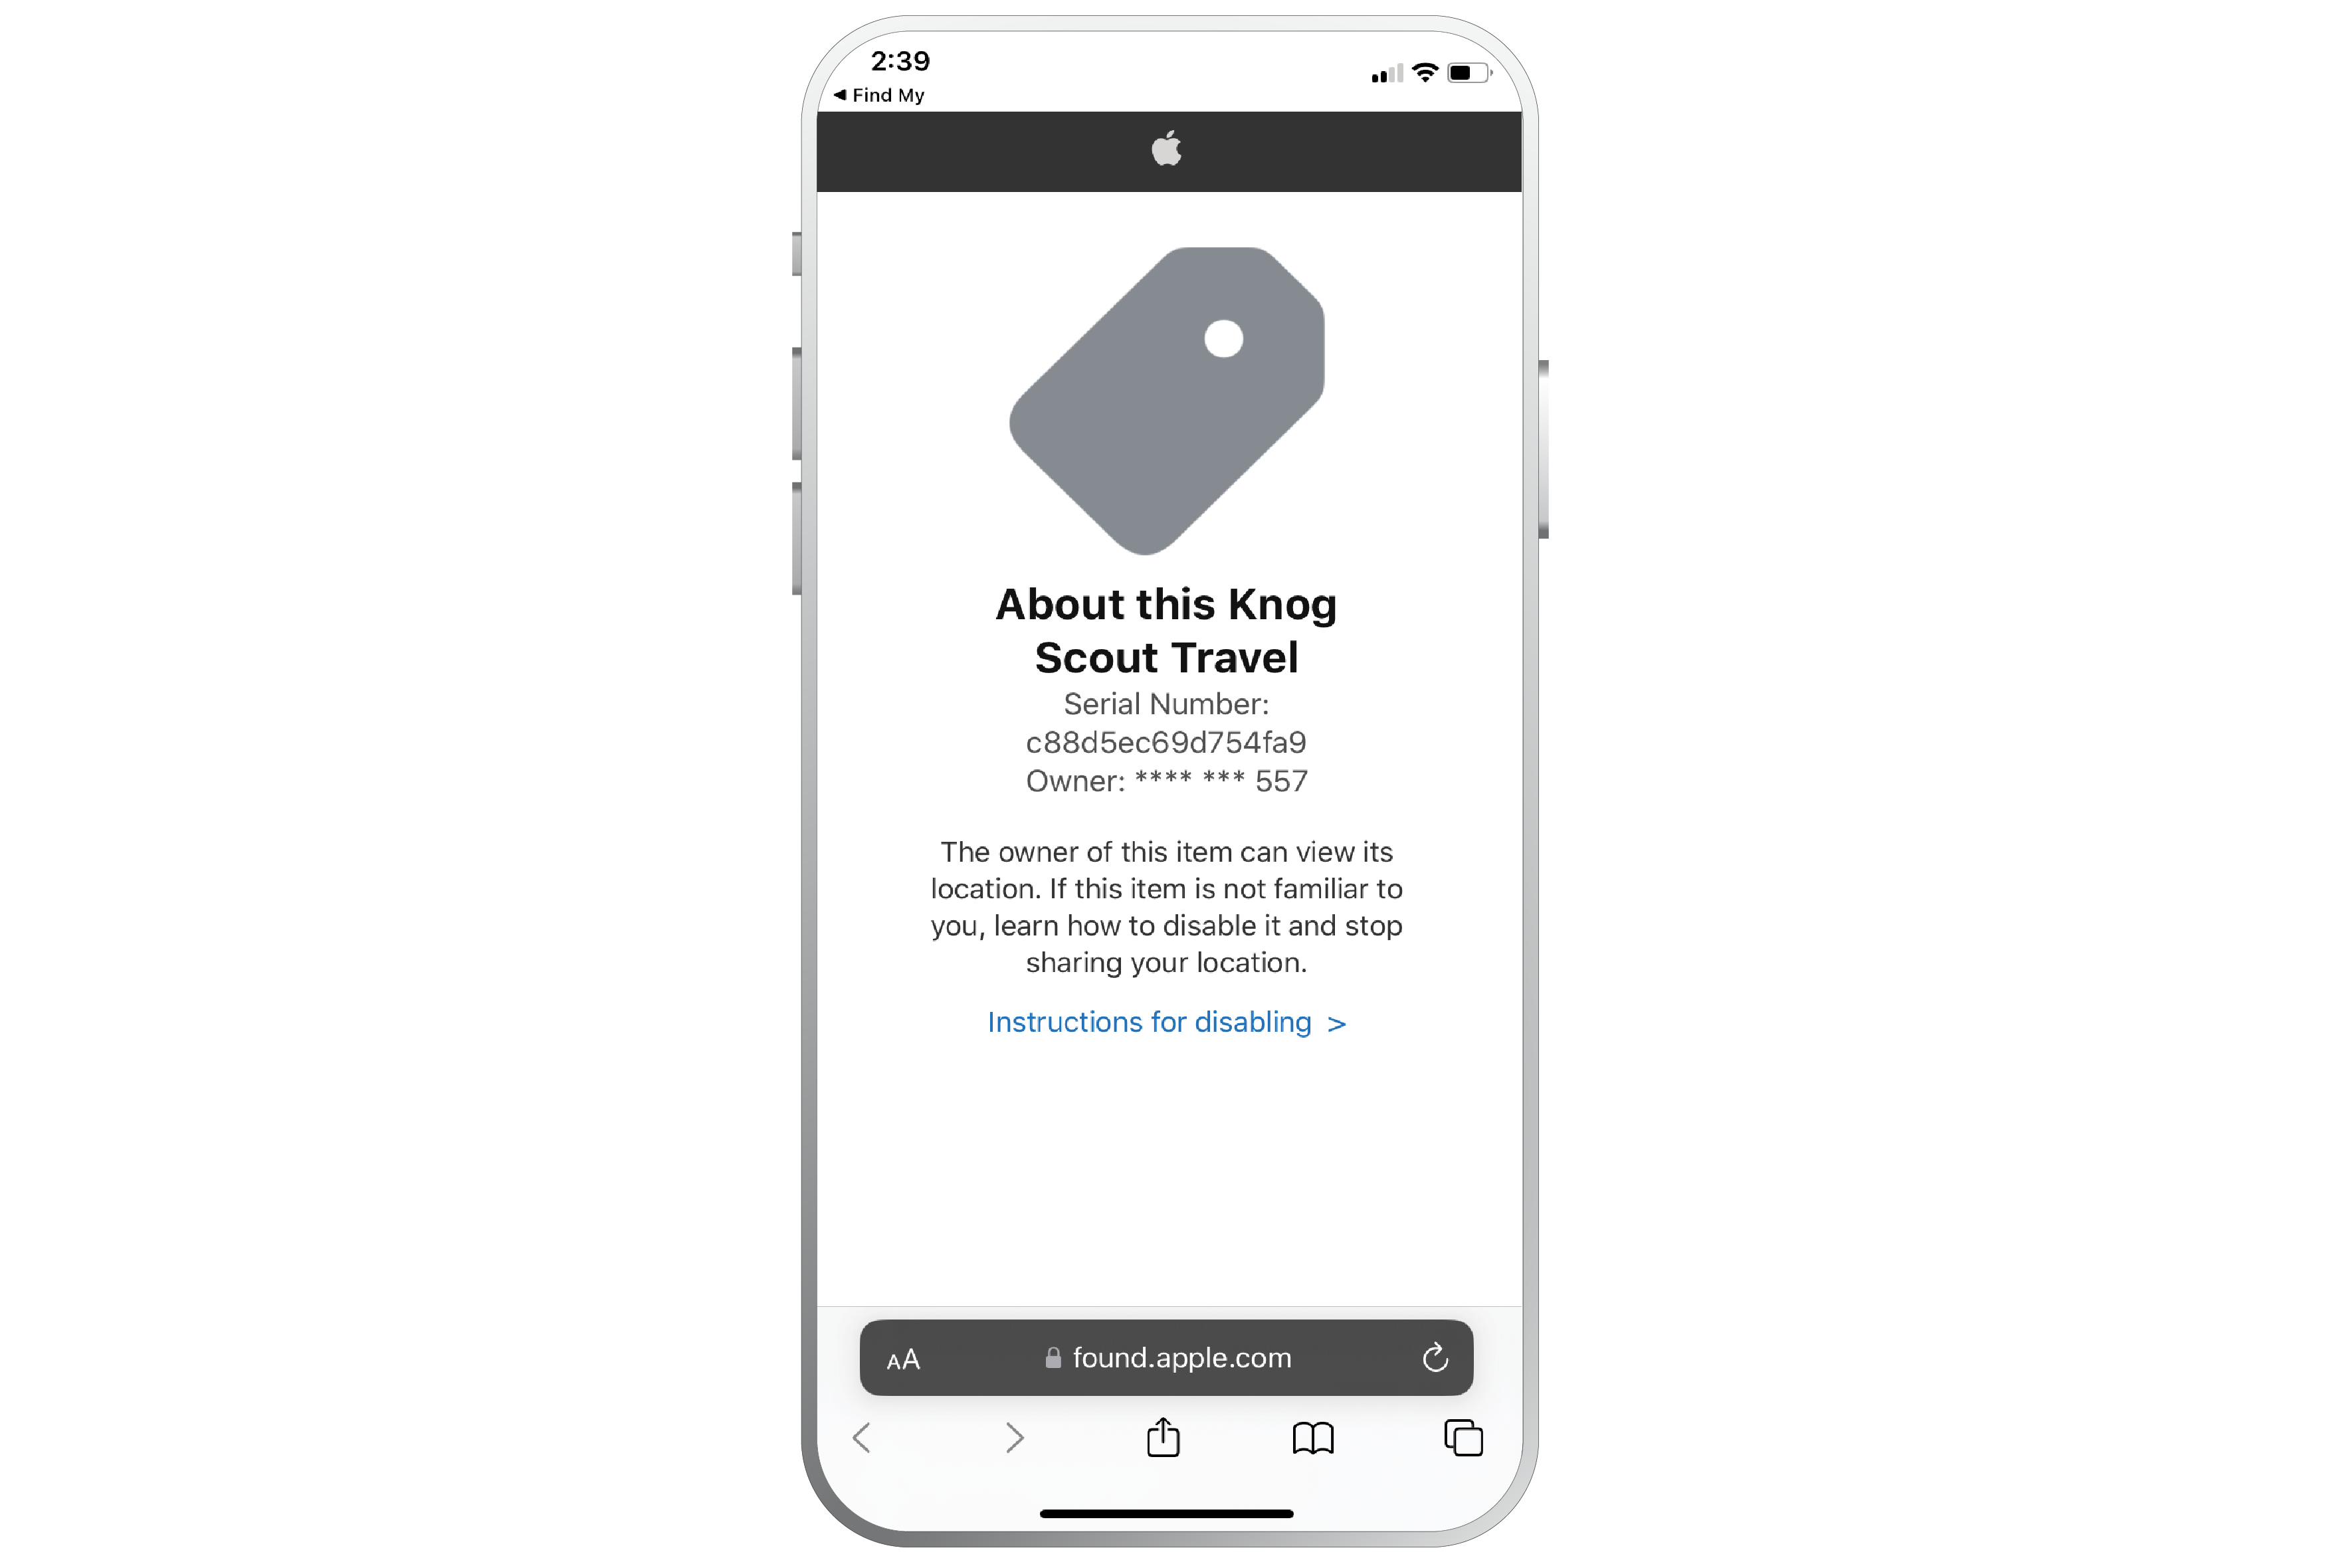
4. A page similar to this should be displayed with the Scout serial number. If the device has been set to lost mode, a message and contact details from the owner may also be displayed here.
Luggage Attachment

1. Choose the desired security tether length for your luggage - 90mm or 160mm.
2. Insert part A, part B & the security tether into the main body of the Scout Travel.
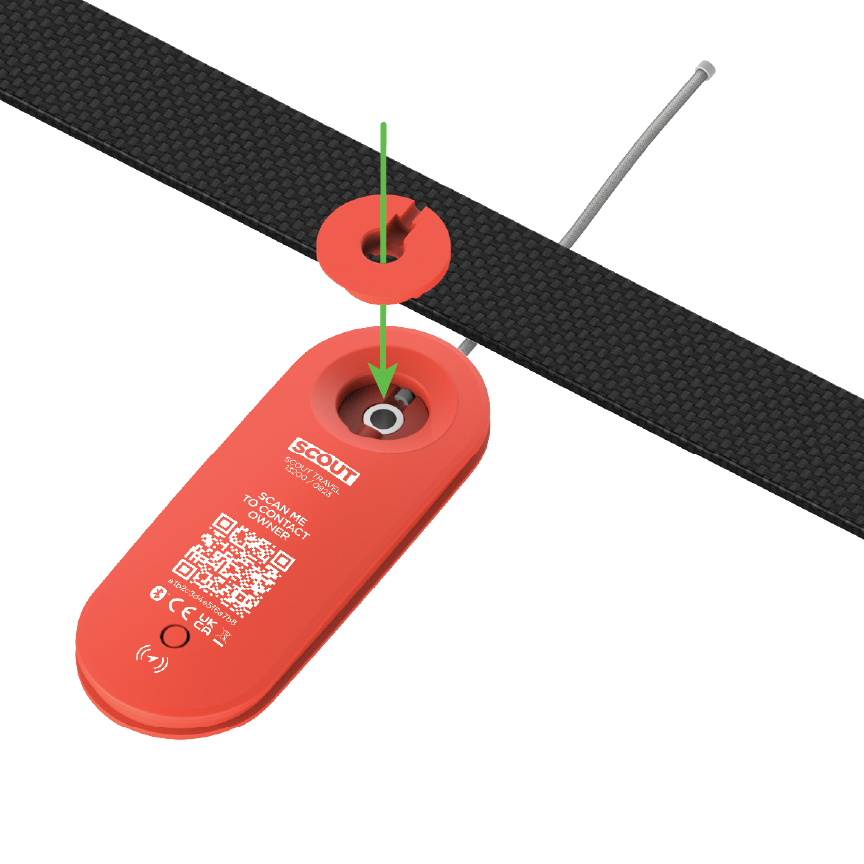
3. Insert part C.
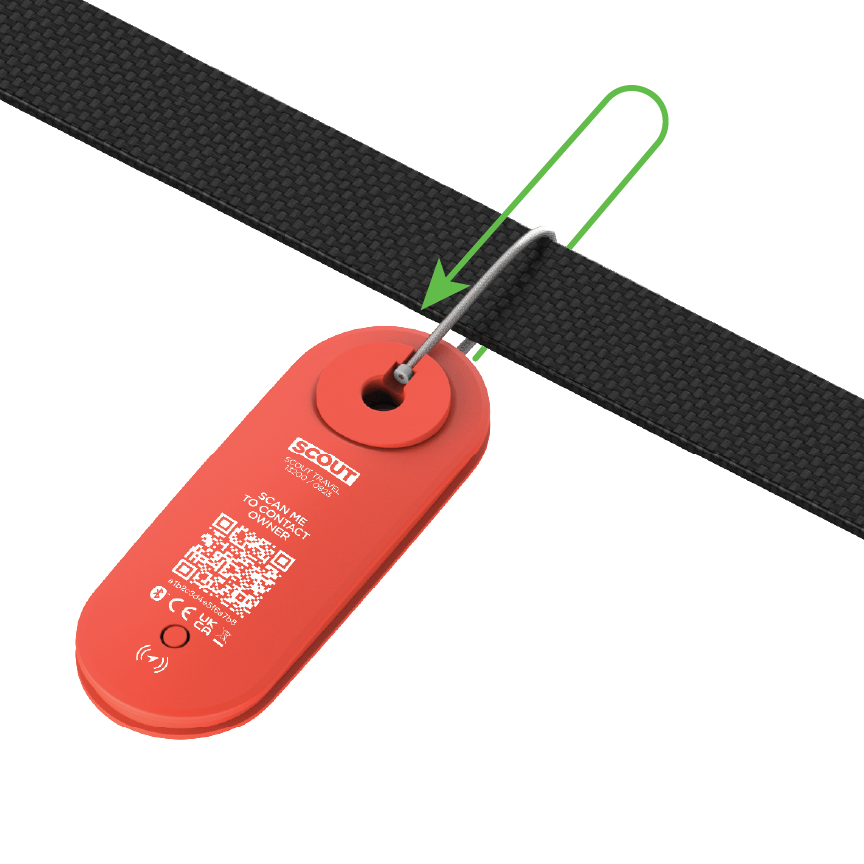
4. Loop the security tether through the handle or strap & click into part C.
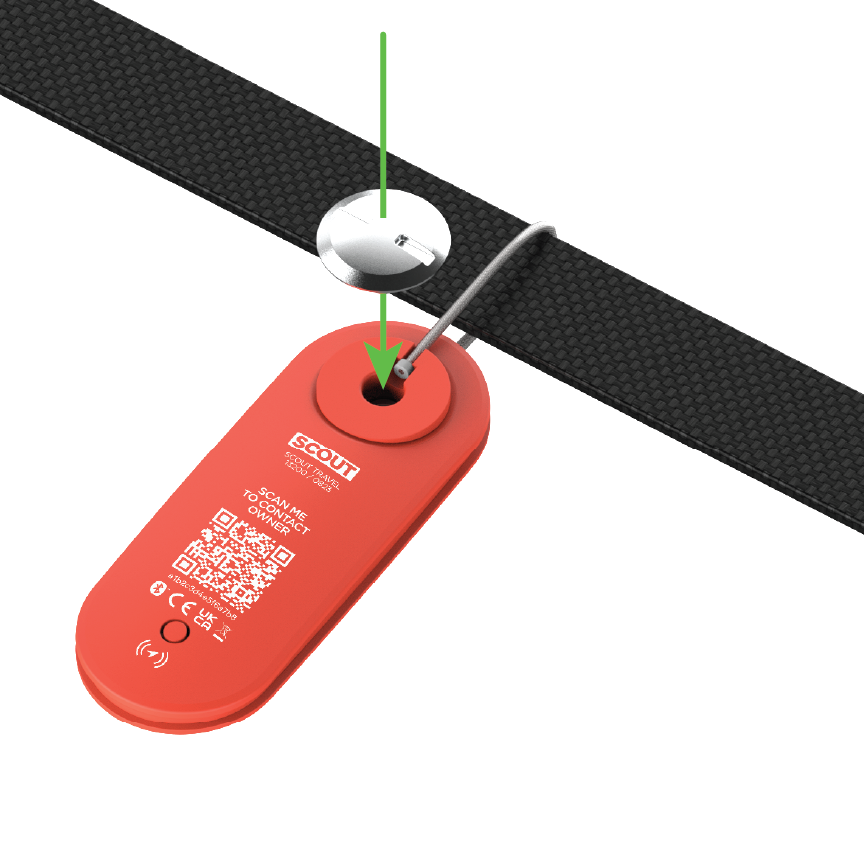
5. Insert part D into part C.
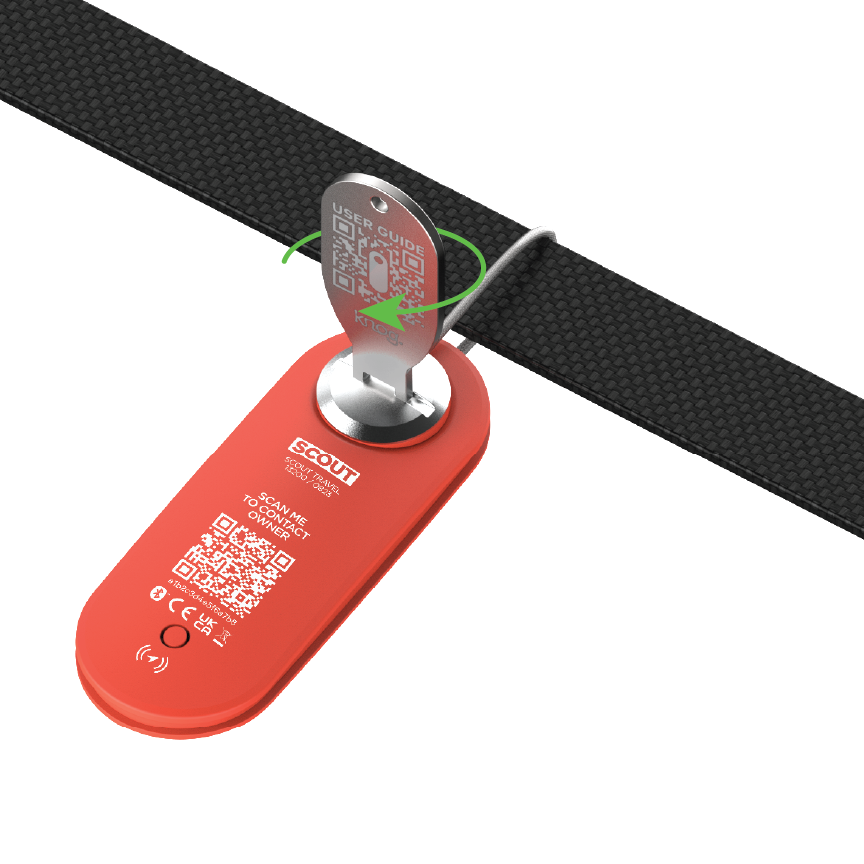
6. Tighten assembled security parts with the security tool.
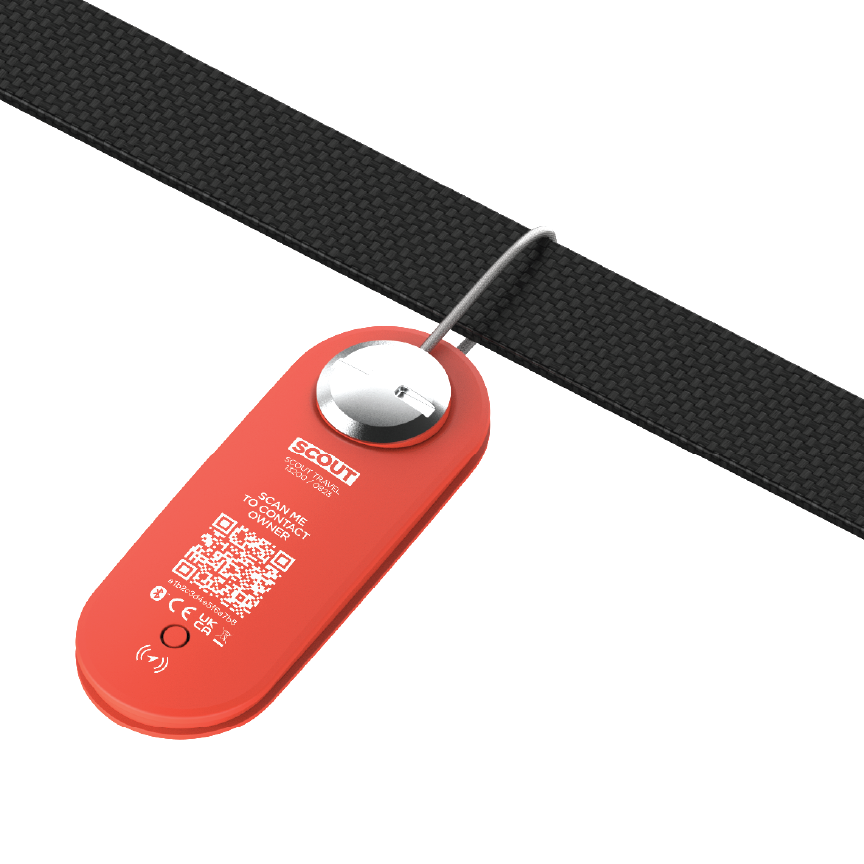
7. Luggage attachment is now complete.
NFC Scanning
Your Scout Travel includes NFC tag technology. NFC scanning will reveal the following information:
- Serial number lookup (see above)
- Contact phone number of the owner if the Scout Travel is in lost mode in Find My App.
To scan the Scout Travel NFC, simply hold your phone above the NFC logo on the top surface of the product. This will open a web browser that provides information about the Knog Scout Travel.

Digital Contact Details
For security reasons, please refrain from highly sensitive or personal information.
The unique QR code on your Scout Travel can encode a personal message or contact details, which will be visible when the QR code is scanned, provided that you choose to add one.
Upon scanning the QR code, there is an option to send a message directly to the owner, which will be promptly delivered to the email associated with your Knog app login.
To set up your Scout Travel Digital Contact Details, follow these steps:
- Connect your Scout Travel to your Knog mobile app, as explained in section 4.1 of the app's instructions.
- In the Knog app, tap the three dots associated with the device to access the settings page.
- Scroll down and choose "Digital Contact Details”.
- Enter a preferred message that can be viewed when the Scout Travel QR code is scanned.


